Build an Announcement Plugin with External API
Learn how to build a simple announcements plugin that allows you to communicate directly to your customers from within the banking dashboard, powered by an external spreadsheet.
After completing this tutorial you should have an understanding of integrating third-party APIs into your own plugins.
What we’re building
The end goal of this project will be to demonstrate how easy it is to build a plugin that integrates one or more external APIs.
Specifically, we’ll be using the Airtable platform to build a simple management system for displaying announcements in our plugin. Because of its simplicity and power, Airtable is a perfect tool to show how you can build more complex plugins with the Banno platform.
What is Airtable?
Airtable is a very simple platform which resembles a basic spreadsheet that you may be more familiar with. The platform itself gives a very visual interface to a traditional database, allowing you to build interesting systems on top of it.
Prerequisites
Before you get started, you’ll need the following:
- An Airtable account
- The back office administrator at your financial institution who has access to Banno People
Are you a financial institution?
If you are a financial institution or working directly with a financial institution, you should work with
the back office administrator at your institution to get appropriate access to Banno People.
Are you a fintech or independent developer?
If you are a fintech or other developer working without a financial institution, you are likely using the
JackHenry.Dev developer portal. In this case, you will not have access
to Banno People, however you will still have the ability to create and configure many aspects of your
external application and plugin.
For more information on this, see our troubleshooting page.
When referencing Banno People it’s important to understand that the intent is to point you towards the place where you can update configurations. If you are using JackHenry.dev, then the experience will be slightly different.
Airtable configuration
Set up the base
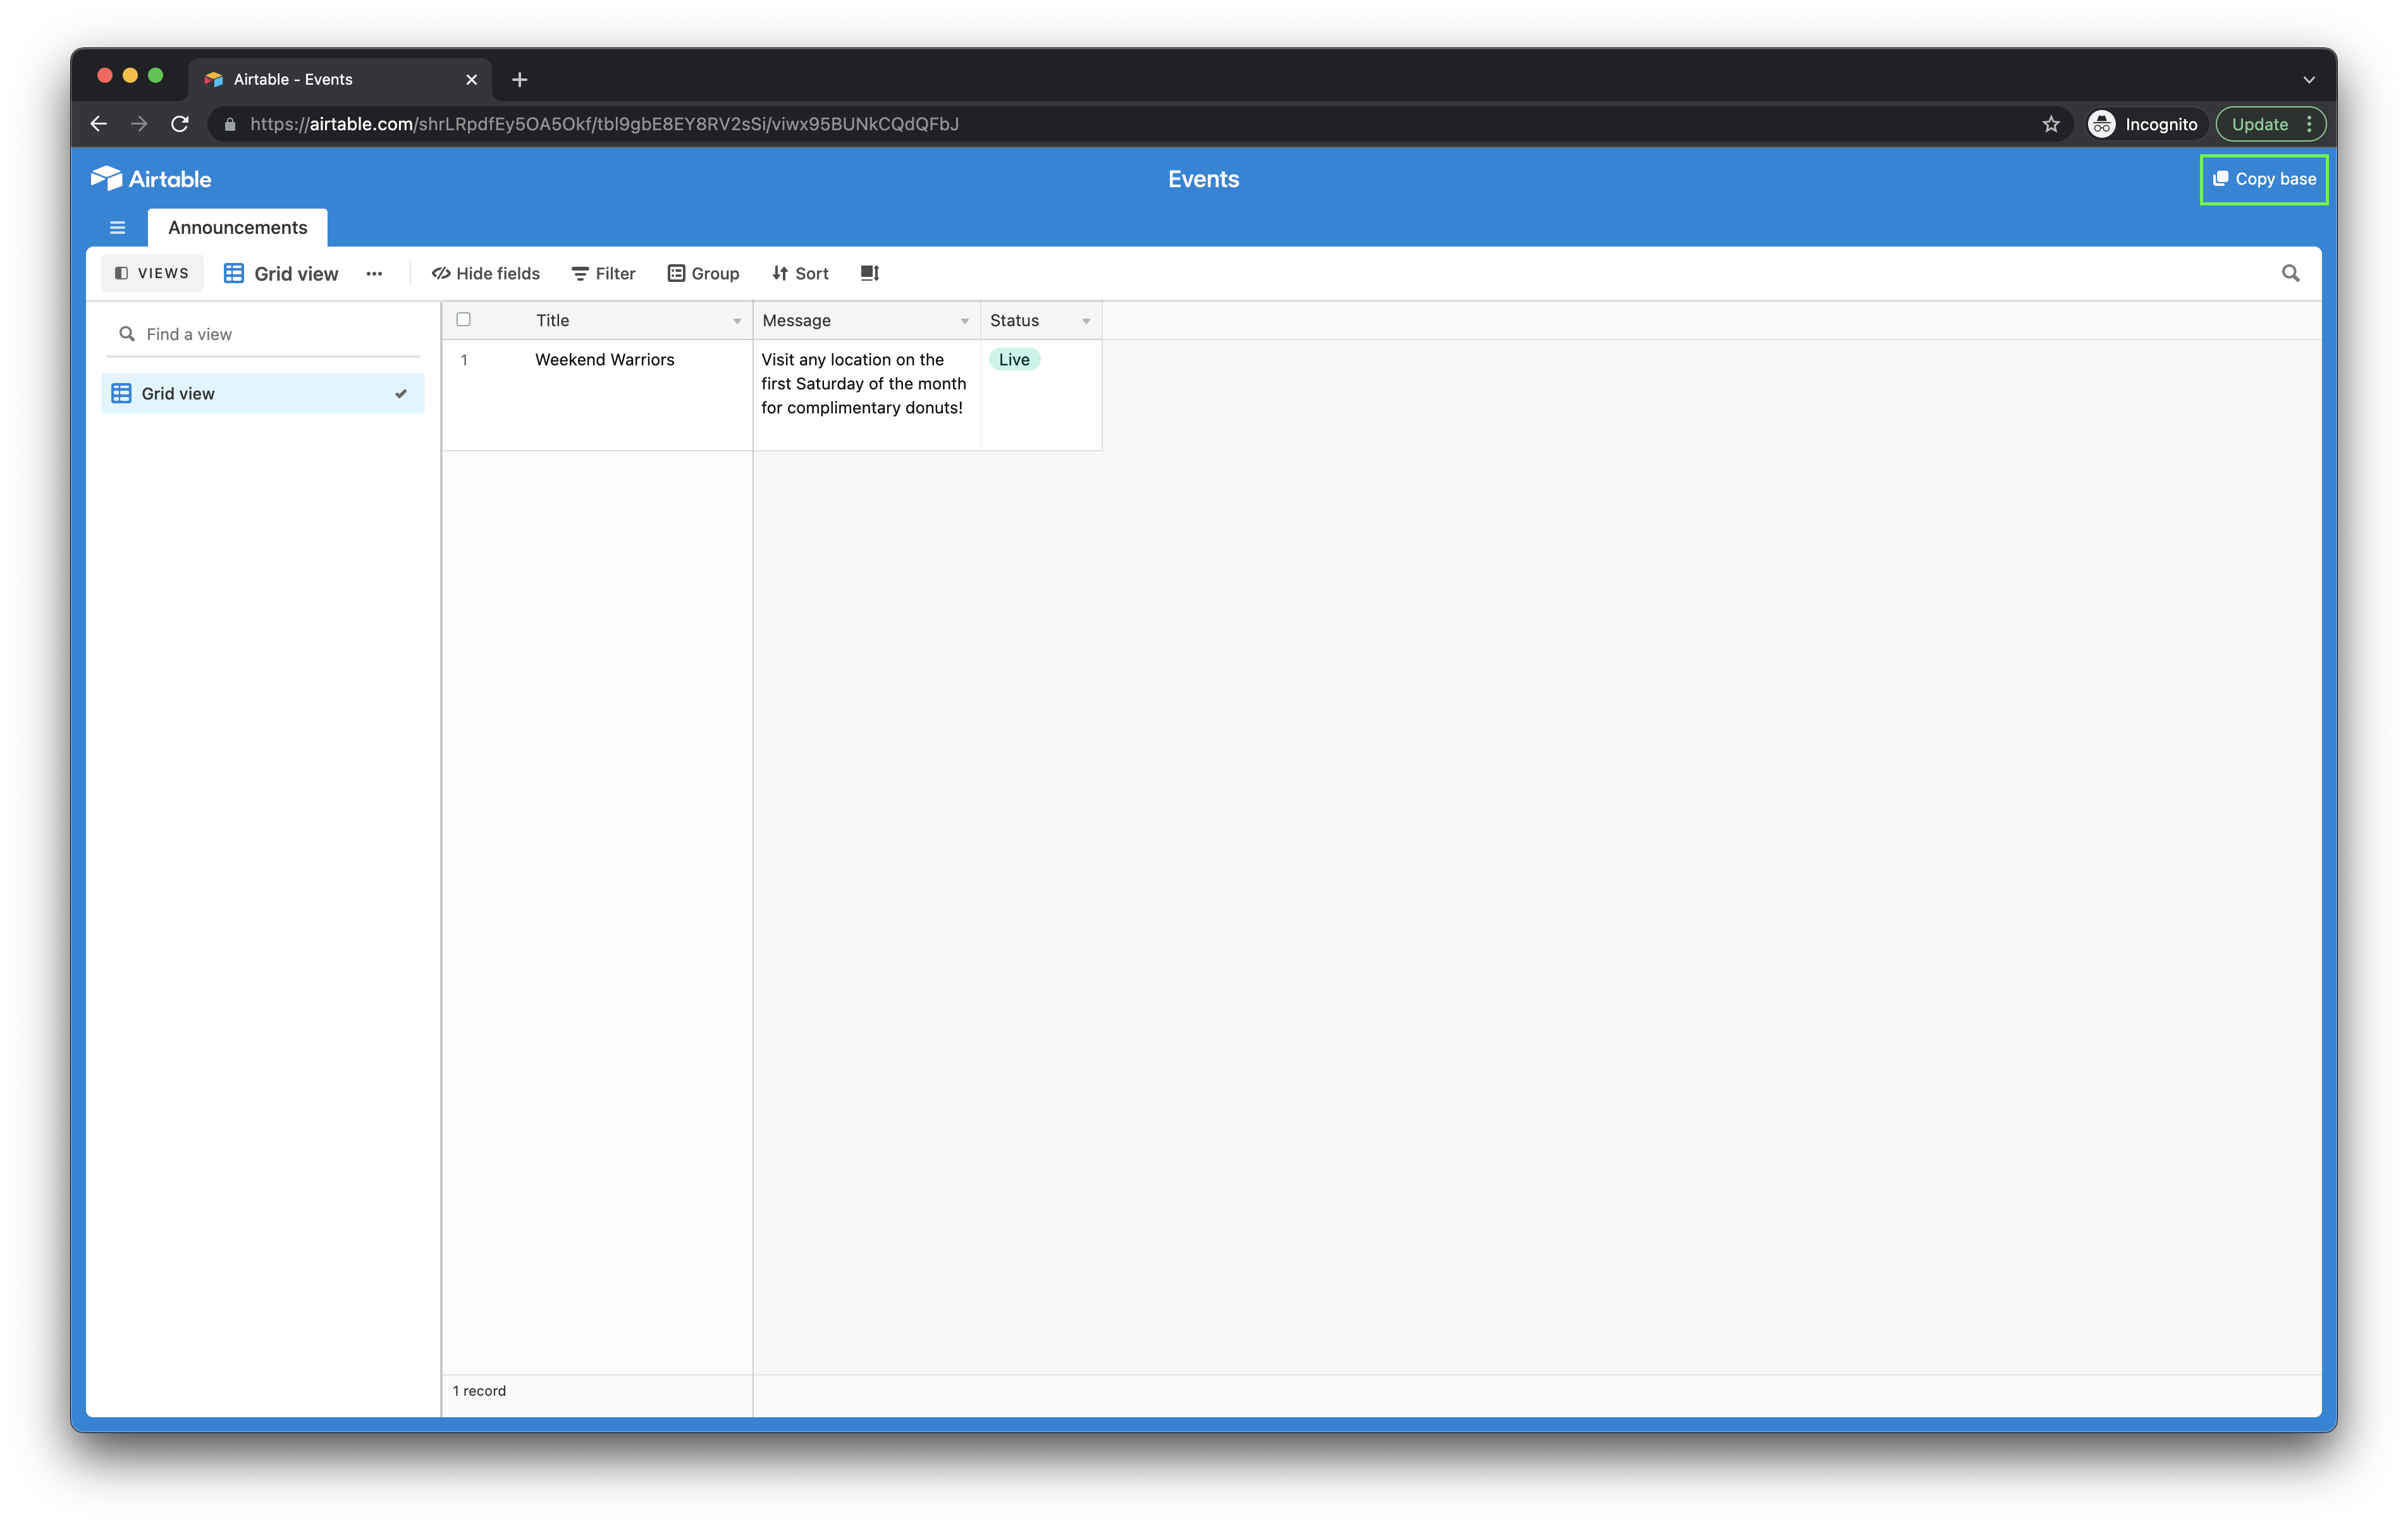
In Airtable, a spreadsheet is simply called a “base”. The simplest way to configure your own for this tutorial is to copy our existing base.
Our base will be simple: a single table named Announcements, containing a Title, Message, and Status column. If you opt to create the base yourselves rather than copying, you will need to make a note of the names you use.
- Navigate to our base
- Click Copy base
- Follow steps to copy the base to your own account
- Name your base Events (double click the existing name in order to change it)
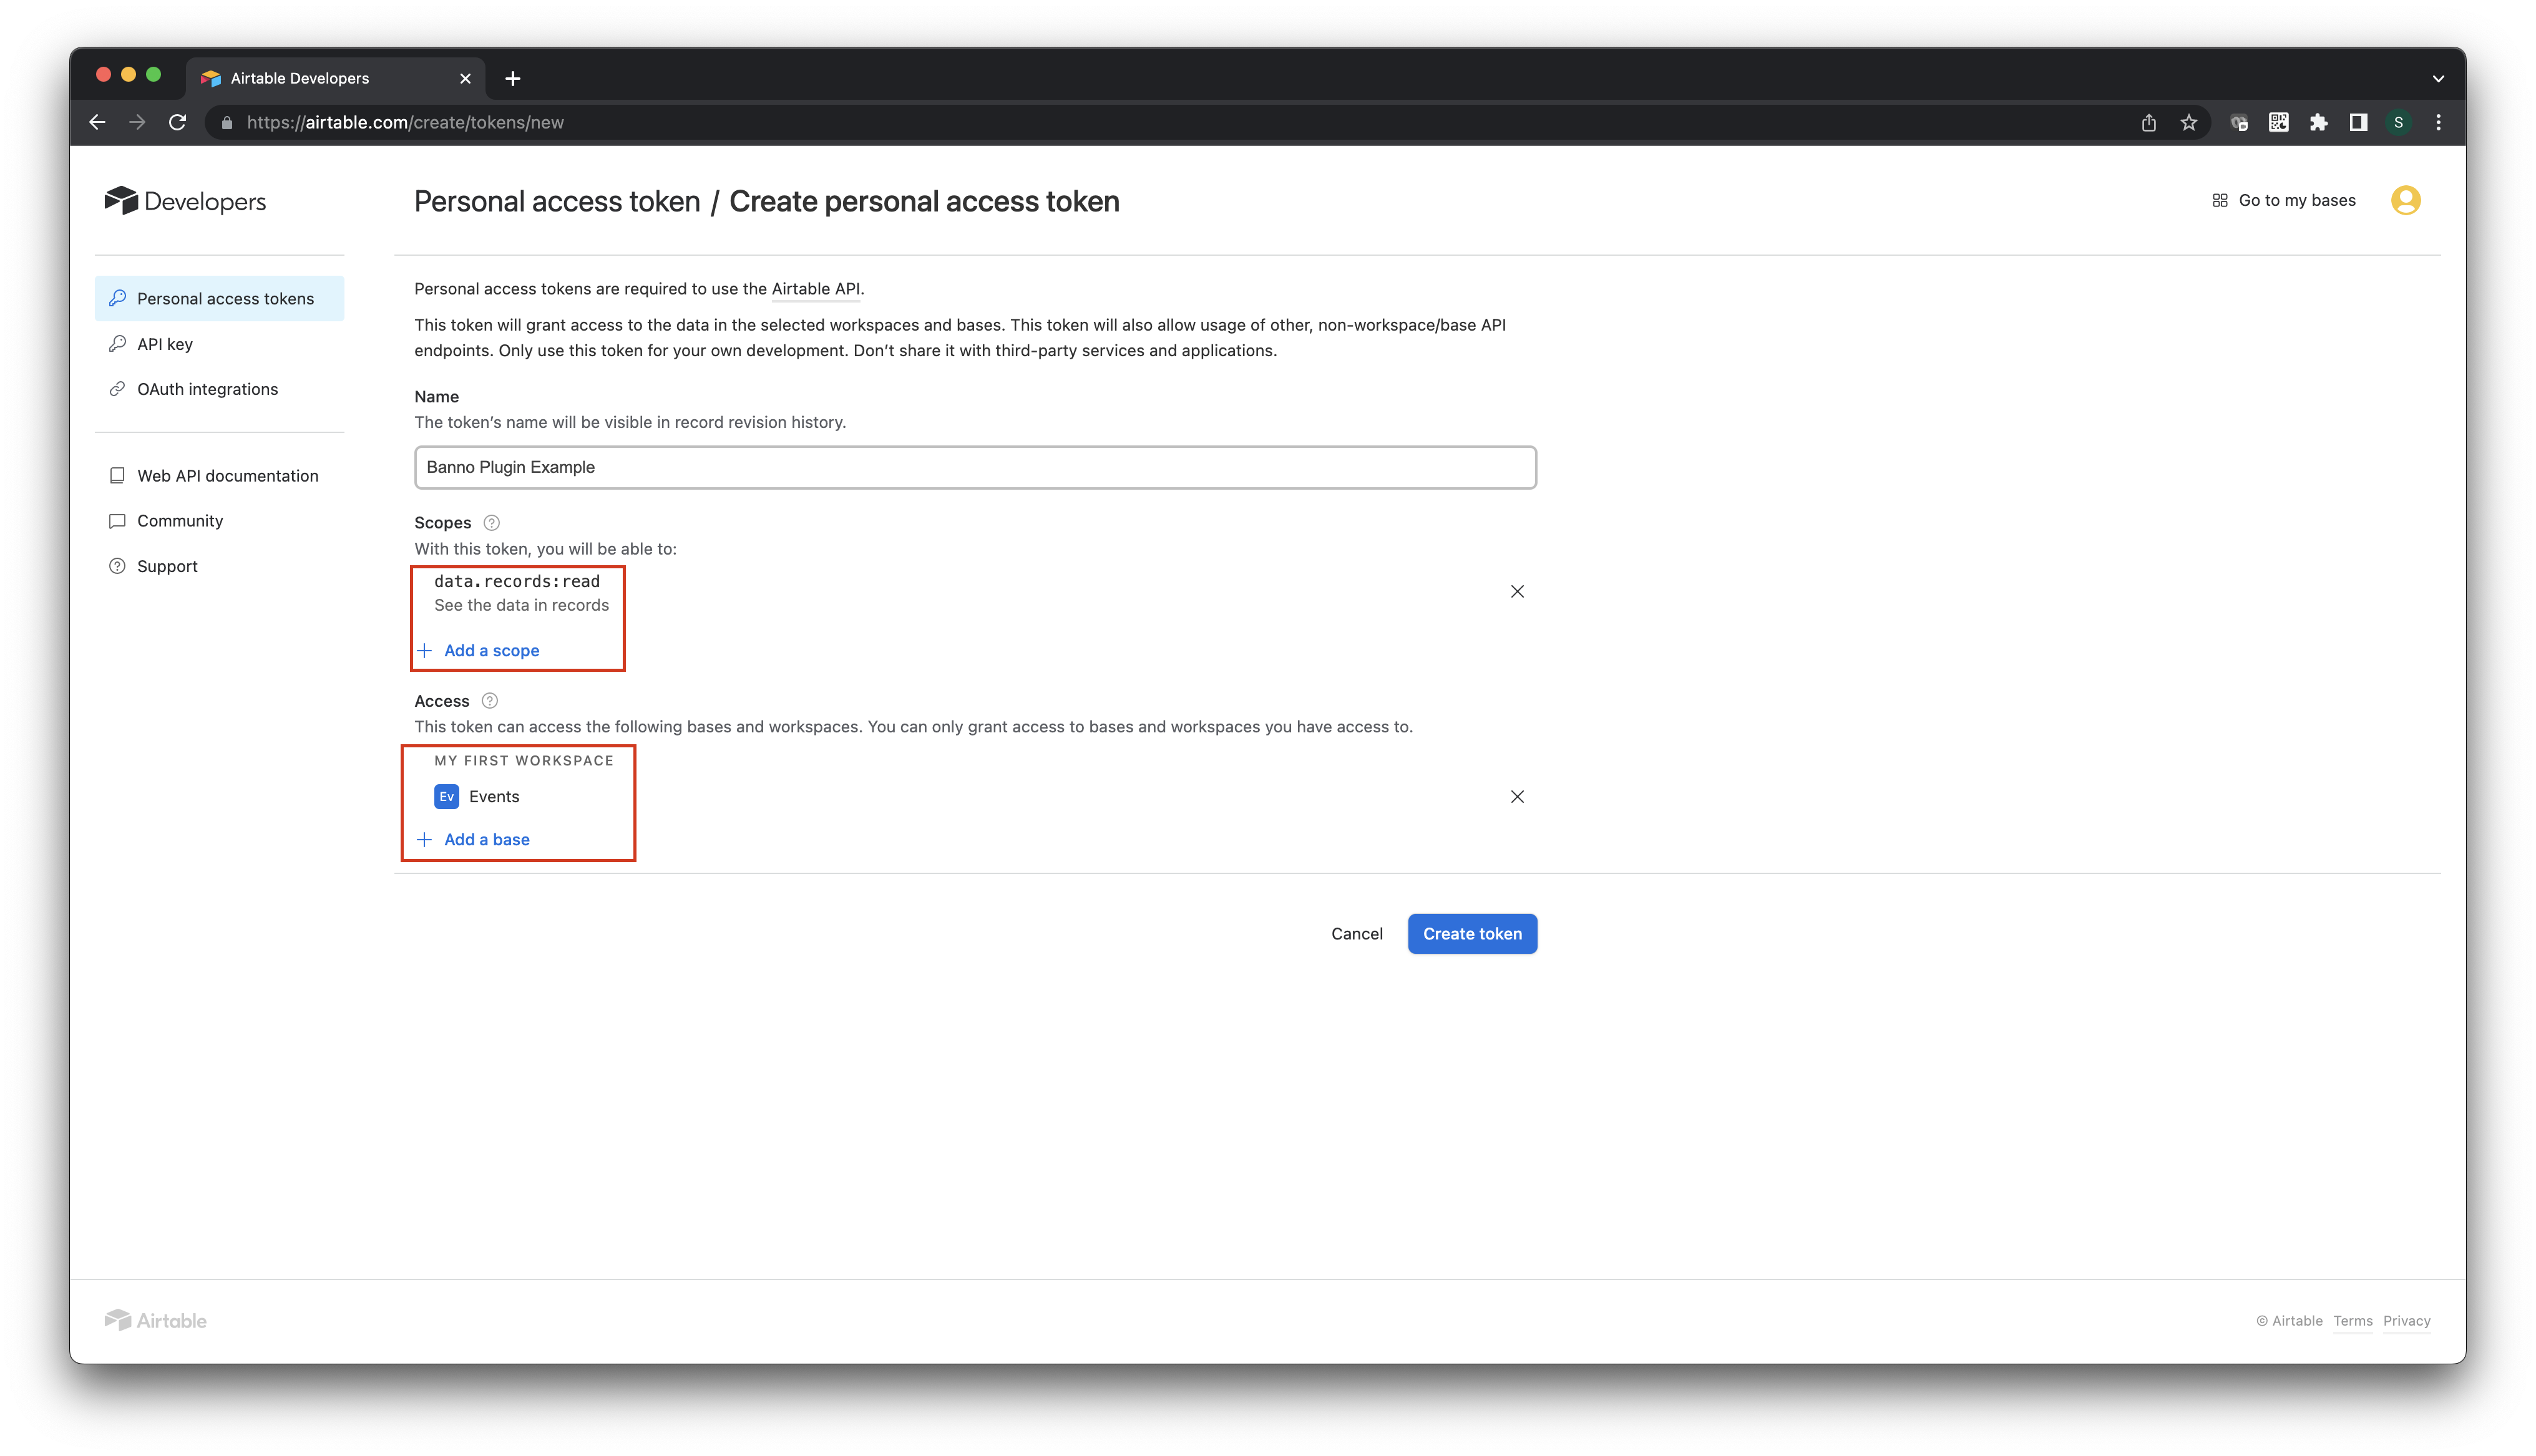
Personal access tokens
Airtable uses personal access tokens as a method for basic authentication, functioning much like API keys. These tokens allow users to make requests to all public Airtable API endpoints. When you create a personal access token, it represents your user account, but has additional restrictions based on the granted scopes, bases, and workspaces.
Essentially, a personal access token can only make API requests within its assigned scopes and access the specific bases and workspaces it was granted permission for. This allows users to have a secure and controlled way of interacting with Airtable APIs while maintaining proper access limitations.
- Navigate to airtable.com/create/tokens
- If it is your first time, you’ll need to click Create token
- Name your key “Banno Plugin Example”
- Add the
data.records:readscope - Add the Events base (that you previously copied) under the Access section
- Click Create token - make sure to save this token somewhere, you will only be shown it once
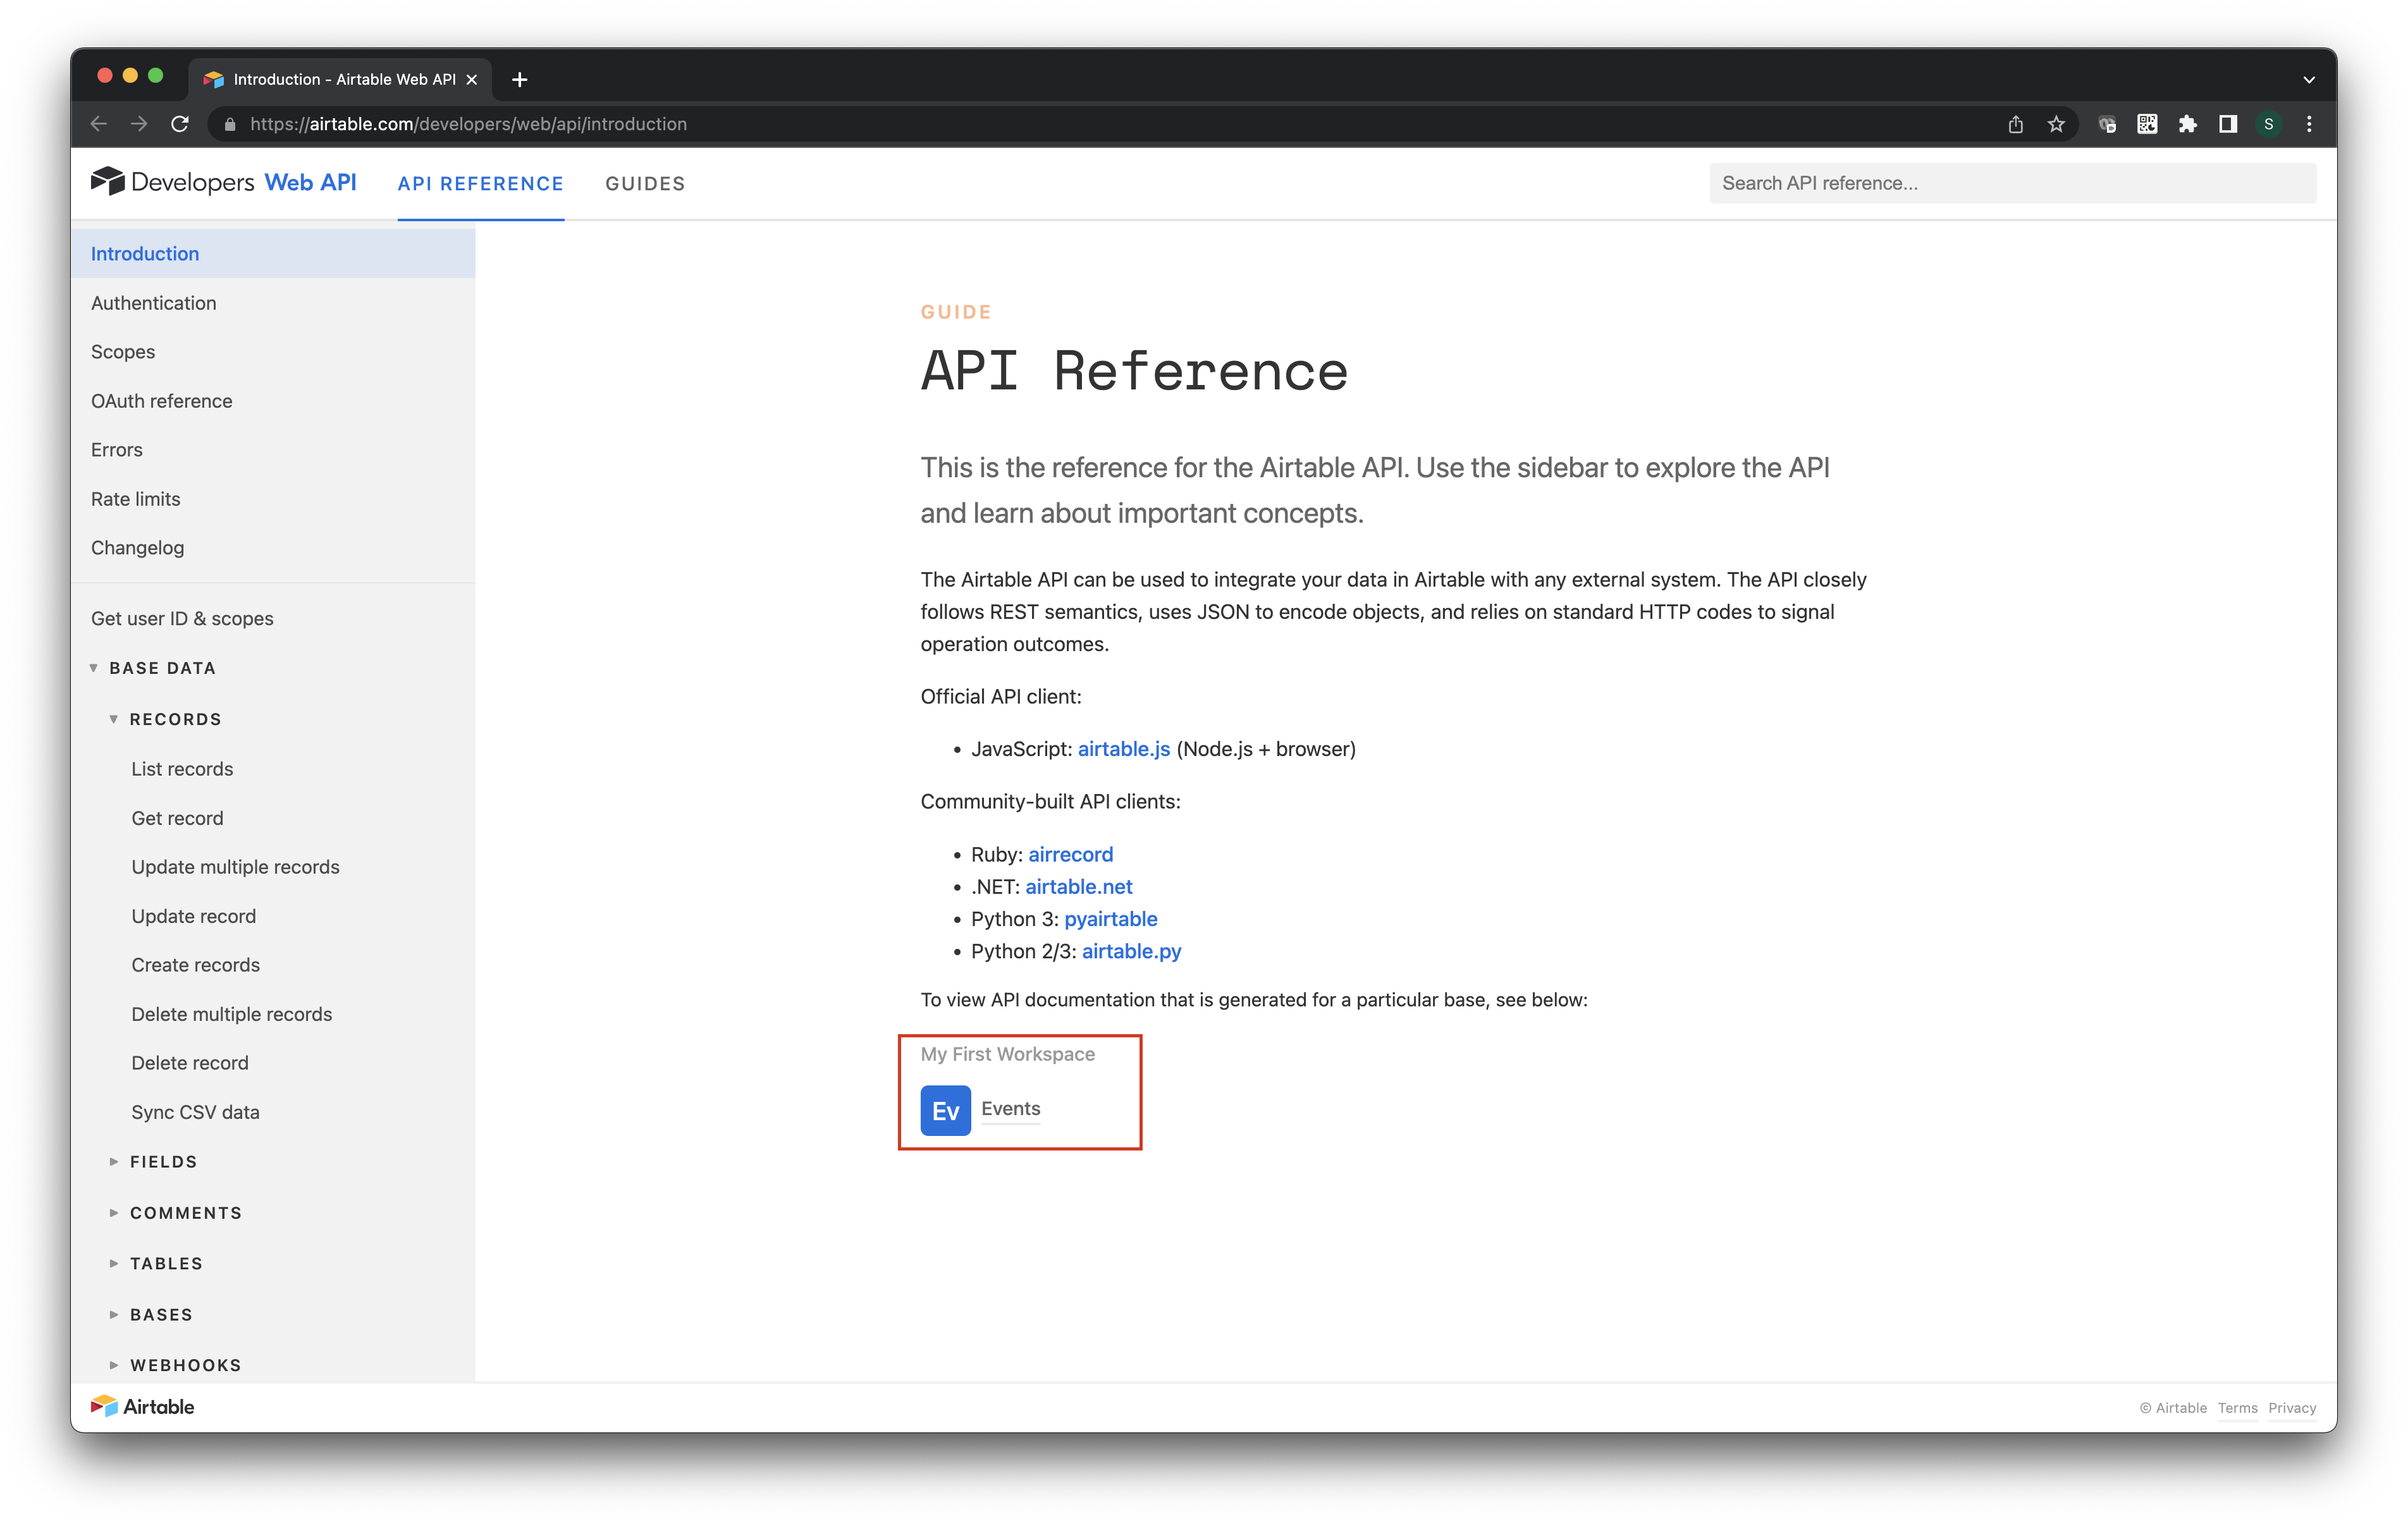
Base ID
The simplest way to retrieve the ID for your base is simply to navigate to Airtable API docs. Scroll down to a list of bases you have access to and select the name of the base you want to use (Events if you followed the above).
You will be greeted with a message towards the top:
The ID of this base is xxxxxxxxxxxxx.
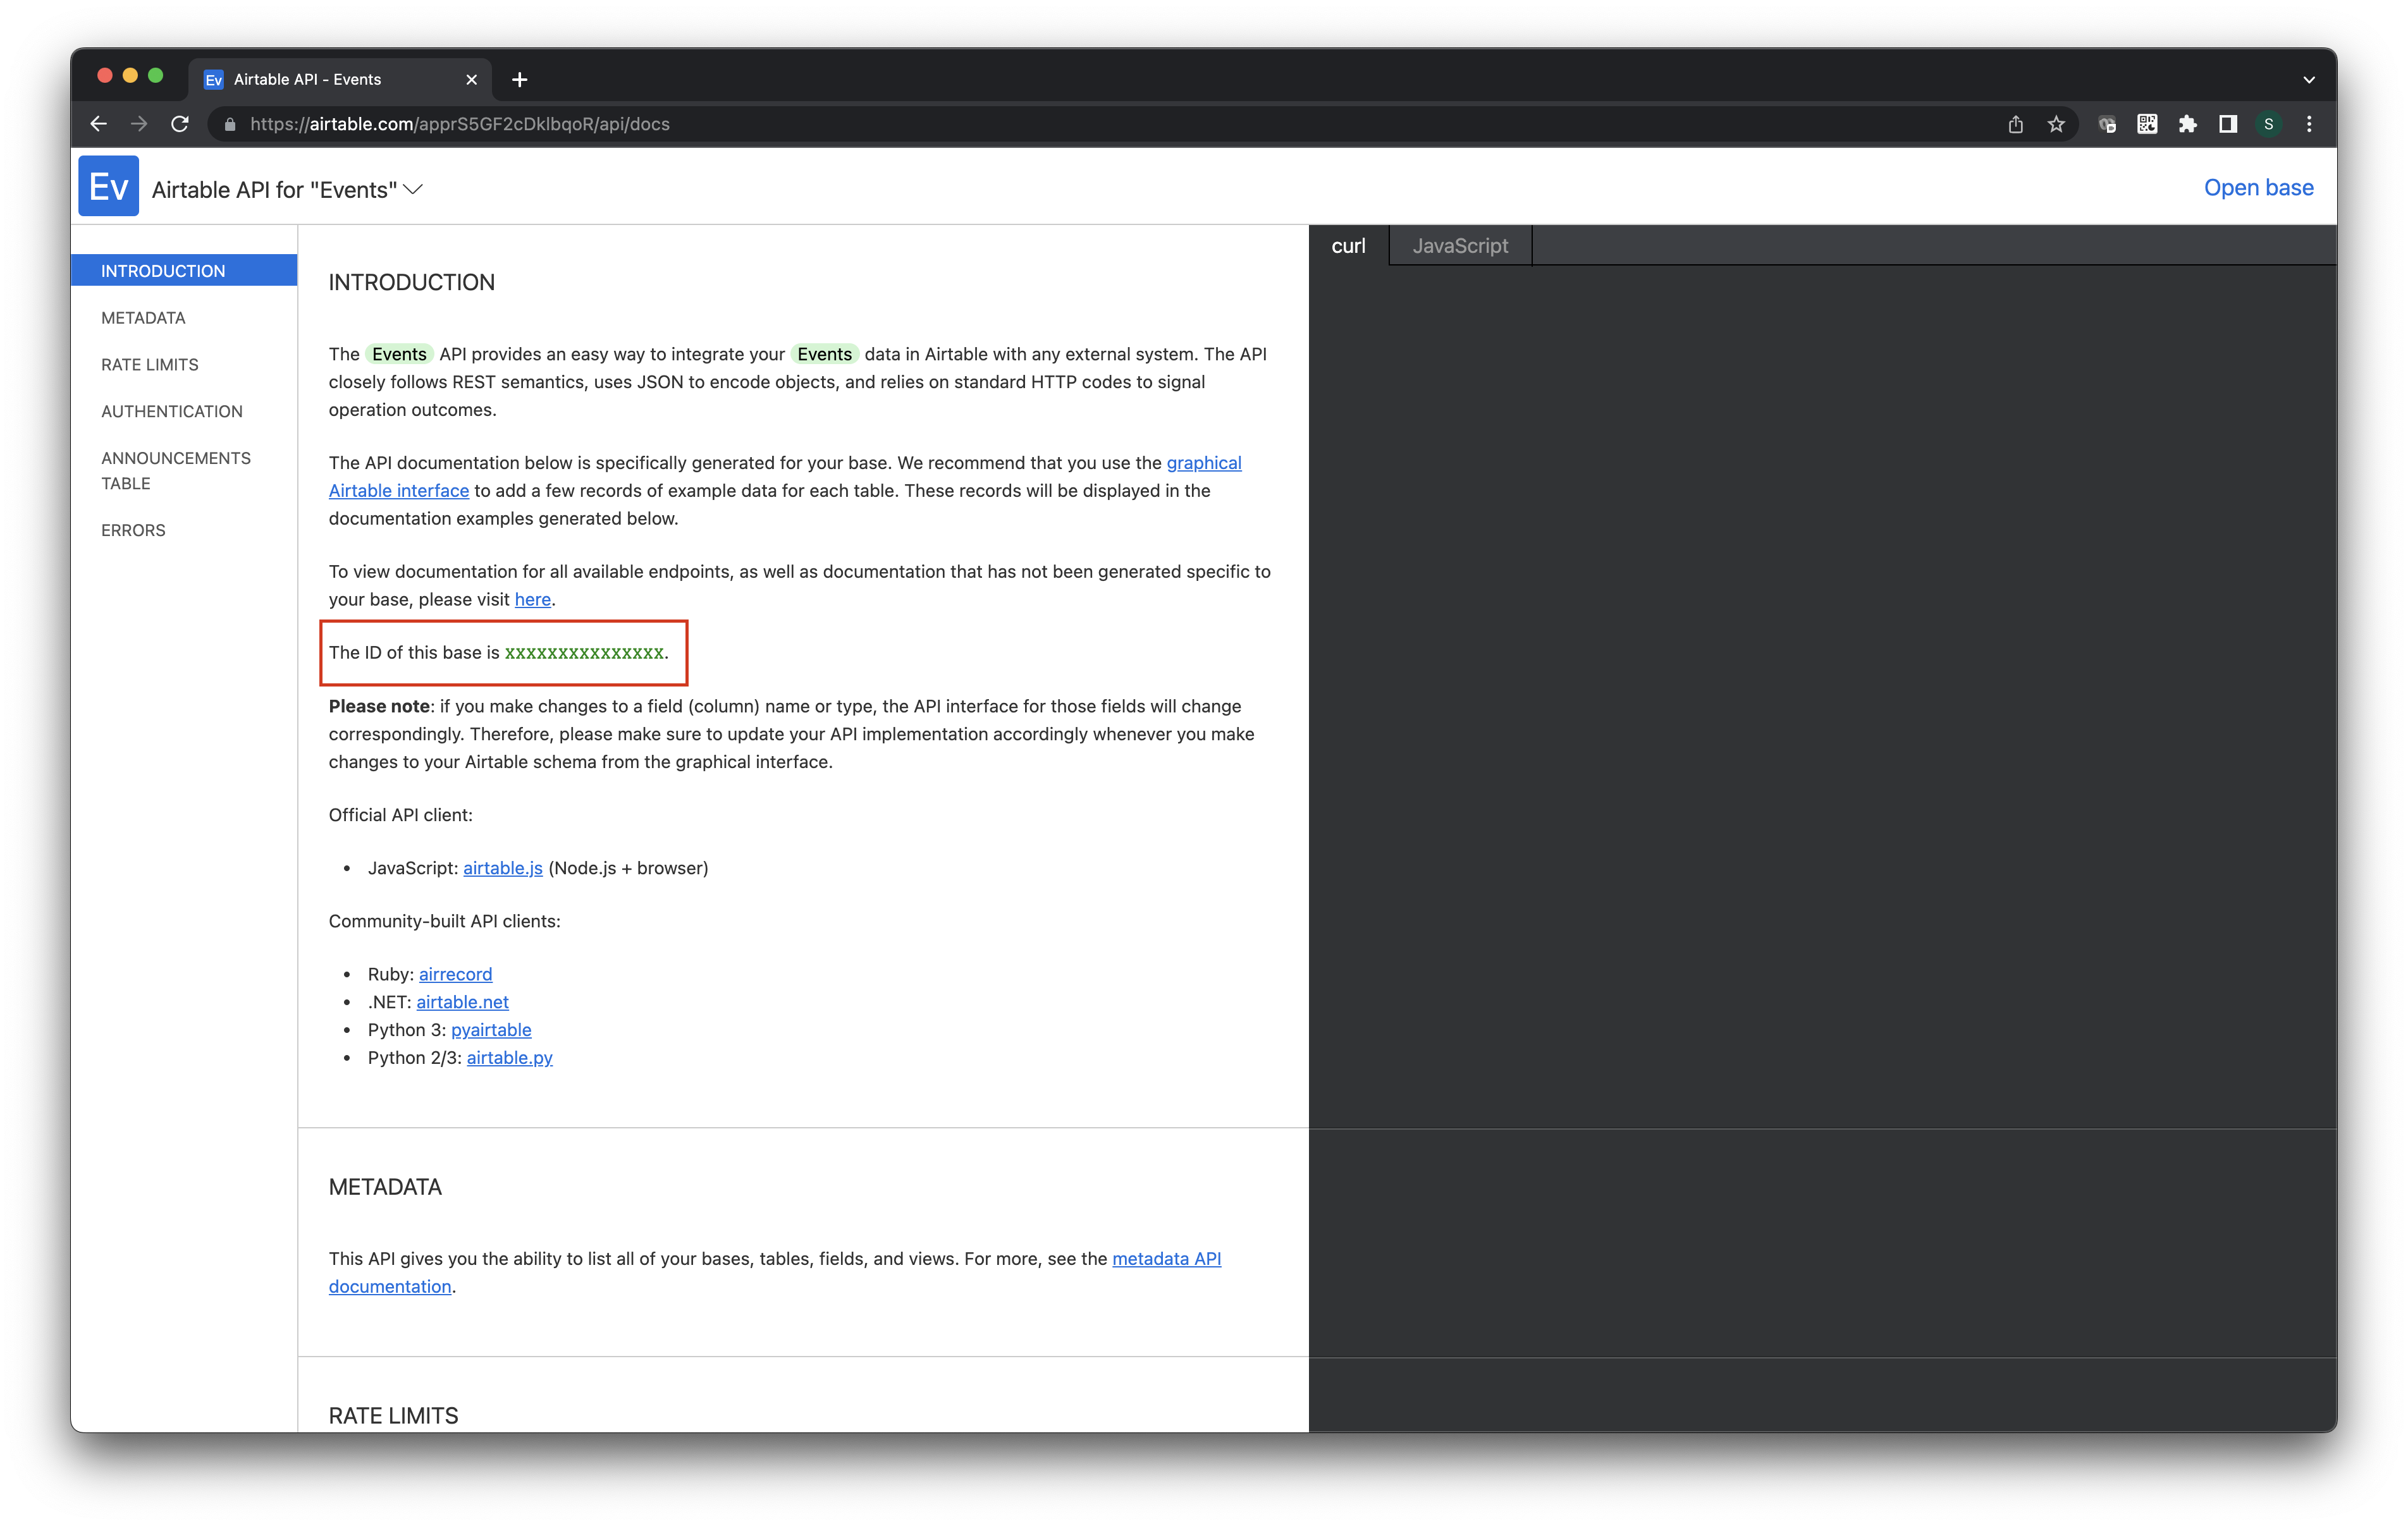
Save this ID for later.
Configure the plugin
External application
You’ll need to configure an External Application in the External applications section of the Banno People app.
For this example, change the following values:
- Create a new external app
- Enter a custom name (ex. My Test Application)
- Uncheck User consent required (since we are building a Plugin Card)
- Click Save
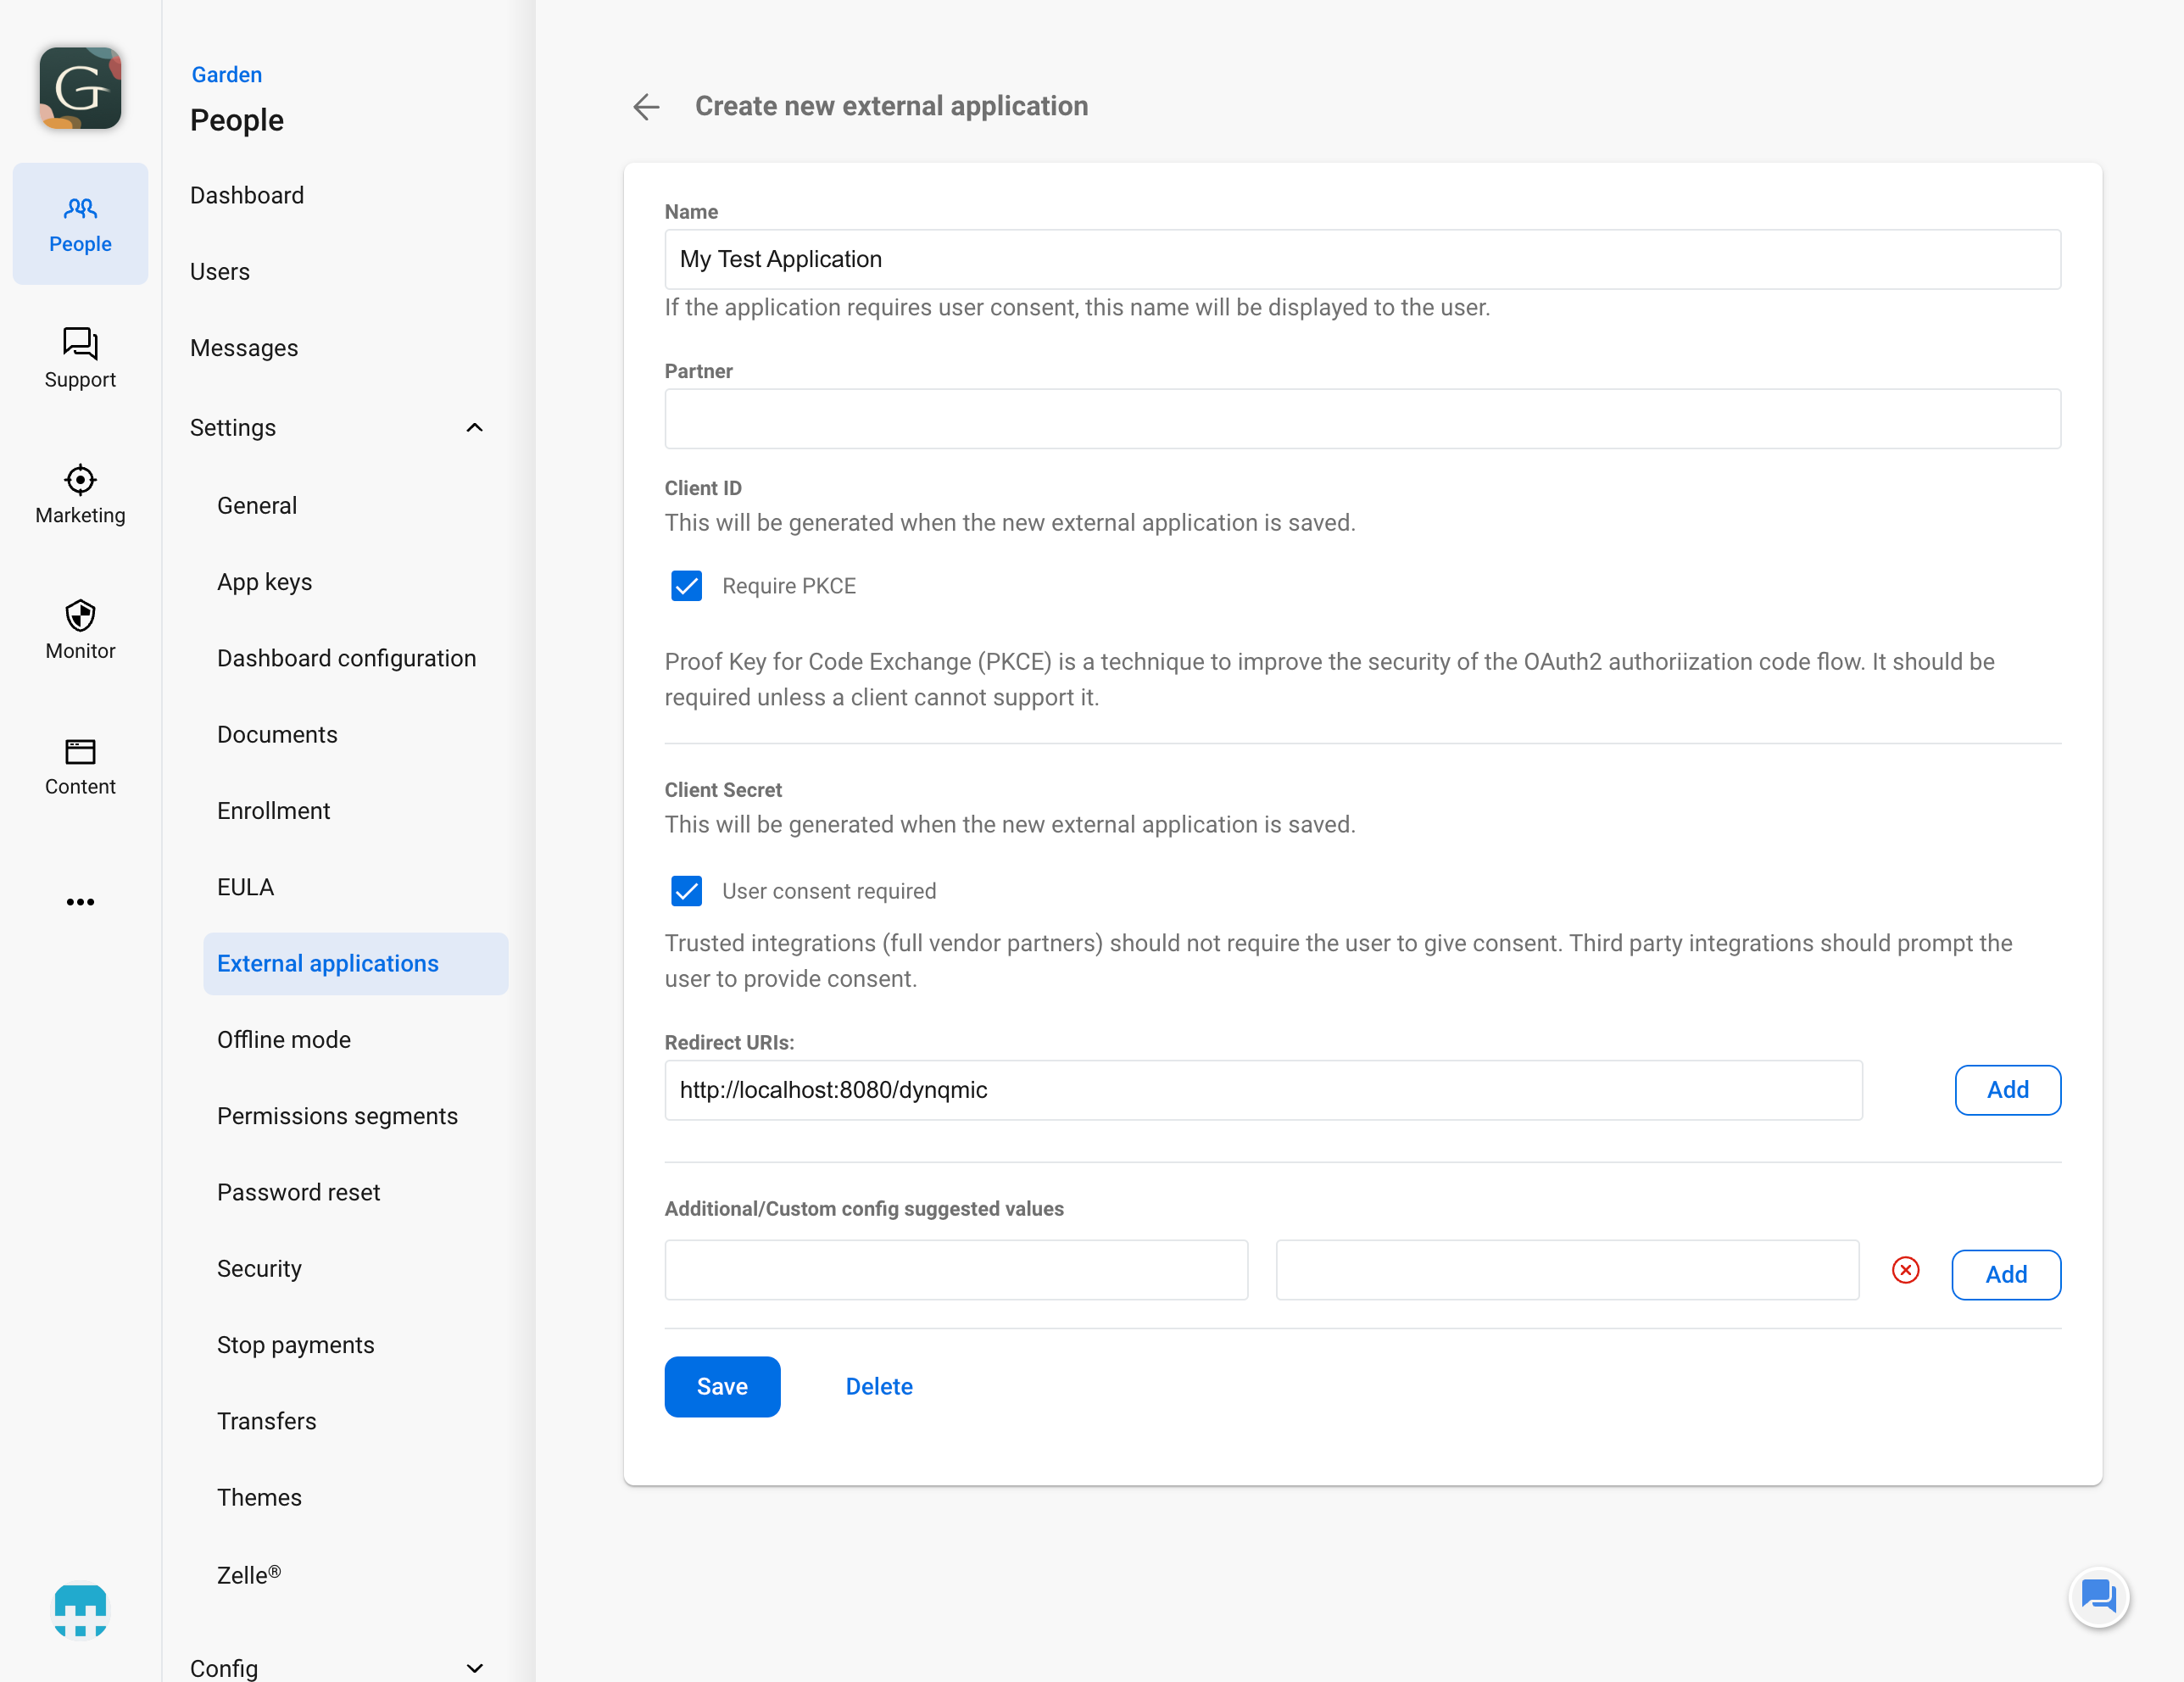
- Select PluginCard as the link type
- Enter a title for the link (ex. Demo Announcement Plugin)
- Enter http://localhost:8080/dynamic for the redirect URI (Note: You may need to change this if you alter the port number later)
- Select Enabled to enable the plugin for users (if you do not enable for all users, you will need to use the User Permissions function to enable for select users)
Plugin configuration
Required steps
You’ll need to create the Plugin Configuration in the Dashboard configuration section of the Banno People app.
- Click Add an item to add a new item to the dashboard configuration
- Scroll to the bottom and click Create a plugin
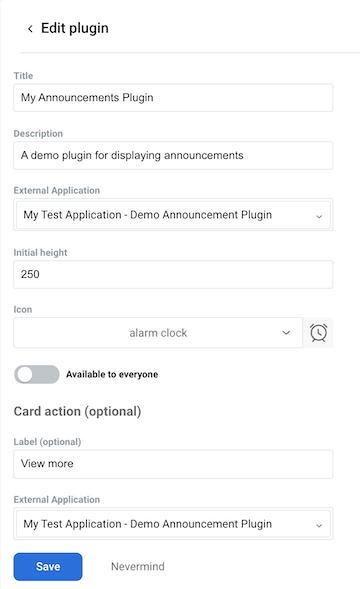
You will be prompted to enter details about your plugin.
- Title: My Announcements Plugin
- Description: A demo plugin for displaying announcements
- External Application: My Test Application - Demo Announcements Plugin (This is the name we used when configuring the external application above)
- Initial height: 250
- Icon: alarm clock (this can be anything)
Optional steps
For this example, change the following values:
- Label: View more
- External Application: My Test Application - Demo Announcements Plugin
Dashboard configuration
Clicking the save button will create the plugin configuration.
The administrator can make it available for your users to add to their dashboard.
- Click Add an item again – this time select the plugin you created
- Make sure to click Save to preserve your new dashboard configuration
Enable plugin card for user
As mentioned in the note above, if you don’t want the plugin enabled for ALL users, we need to select which users to enable the Plugin Card for.
- From Banno People, click the Users and search by username.
- Click on the user
- Click Permissions
- Find and enable the plugin under Plugin cards
The user will now have the plugin available to them in the Banno Online dashboard.
Running the plugin
Start by cloning the repository, Simple Announcement Plugin.
The code
In this plugin, we will be fetching data from an external resource and displaying it to the user within their Banno Online Dashboard. In this simple example, we will not be utilizing any authentication because we do not need any user information.
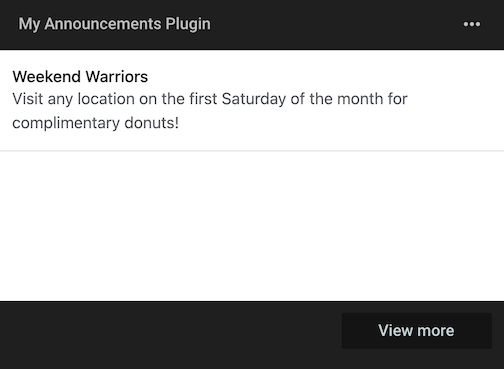
The plugin will perform 2 simple operations: fetch data from Airtable and display any announcements with the “Live” status to the user.
Notable files
- config.js is the file where all configuration settings and API keys will be saved.
- index.js is the file where the operations to fetch and serve data will occur. The project specifically uses the Express framework as a simple server and the EJS template system for simplicity. You’ll notice that we use the /dynamic route to power our plugin, primarily we chose this so that if you’ve followed the Build Your First Plugin Quickstart, your external app and plugin do not need to be reconfigured.
- views/announcements.ejs is the template file where the HTML is rendered from. The EJS template system allows us to use both JavaScript and HTML to render our data rows (specifically we are able to loop through the rows and render them dynamically).
Setup
Before we run the application, we need to make sure that all the dependencies are available.
- Install dependencies using the
npm installcommand
Banno Online
User’s dashboard
You’ll need to add the plugin to your user’s dashboard.
Do these steps:
- Log into Banno Online
- Click on Organize dashboard
- Click on Add a card
- Click on My Announcements Plugin
- Click the back arrow on Add a card in the navigation header
- Click the done button on Organize dashboard
Running the plugin
Configuration
The primary configurations that we need to set are within the config.js file. When you clone the repository above, you will want to start by renaming the config-example.js file to config.js.
- airtable_personal_access_token: Your Personal Access Token from Airtable
- airtable_base: Base ID from Airtable (see above to find)
- airtable_table_name: ‘Announcements’ (unless you changed the name)
Start the plugin
- Start the server using the
npm run startcommand
The server will now be running locally. You’ll see this log statement in the terminal:
App running at http://localhost:8080
Now, navigate back to Banno Online dashboard, you can see that the plugin now fetches and displays live announcements to users in their dashboard.
Now, add another row to your Airtable base with another test event (remember to set the status as Live). Refresh your Banno dashboard to see the changes reflected in your plugin.
Next steps
Congratulations! Continue your learning journey:
If you would like to expand on this plugin, some ideas you can borrow as inspiration:
- Follow the Build Your First Plugin Quickstart in order to add in user authentication and filter announcements based on user information.
- Have a how-to question? Seeing a weird error? Get help on StackOverflow.
- Register for the Developer Office Hours where we answer technical Q&A from the audience.