New User Enrollment
Each product is responsible for determining and enforcing its own requirements for eligibility, before users are sent to UIS to establish a new (or connect to an existing) Identity.
For example, Banno has two different supported flows:
Self-enrollment (Retail users)
- User must enter tax id (TIN), account number, and phone number; those values are matched to core data (by Banno, not by UIS).
- If a matching core record is found, the user must retrieve a one-time passcode sent to the phone number on the core record. This step helps Banno to confirm the user should be allowed to proceed with gaining access to accounts connected to a particular CIF. This happens within Banno, before the user is directed to UIS.
- If the one-time code is verified, the user is redirected to UIS enrollment so they can create (or link an existing) identity.
- Once the identity is established, the user is redirected back to Banno. Banno stores the unique ID for the identity from UIS, and associates it with Banno’s own unique ID for the user.
Email invitation (Business users, some retail users)
- An FI employee OR a Banno Business online banking user with the required permissions creates a new user in Banno, and assigns them any needed Banno permissions.
- The FI employee or Banno Business admin user emails the new user an invitation link.
- The new user clicks the link and is redirected to UIS enrollment so they can create (or link an existing) identity.
With both of these flows, Banno collects and passes user profile details to UIS through the API a/uis/api/v0/institutions/{institutionId}/enrollment/start.
Example Flow
Here’s an example showing the business user creation step within Banno, in which an admin user creates a new user and supplies their basic profile details.
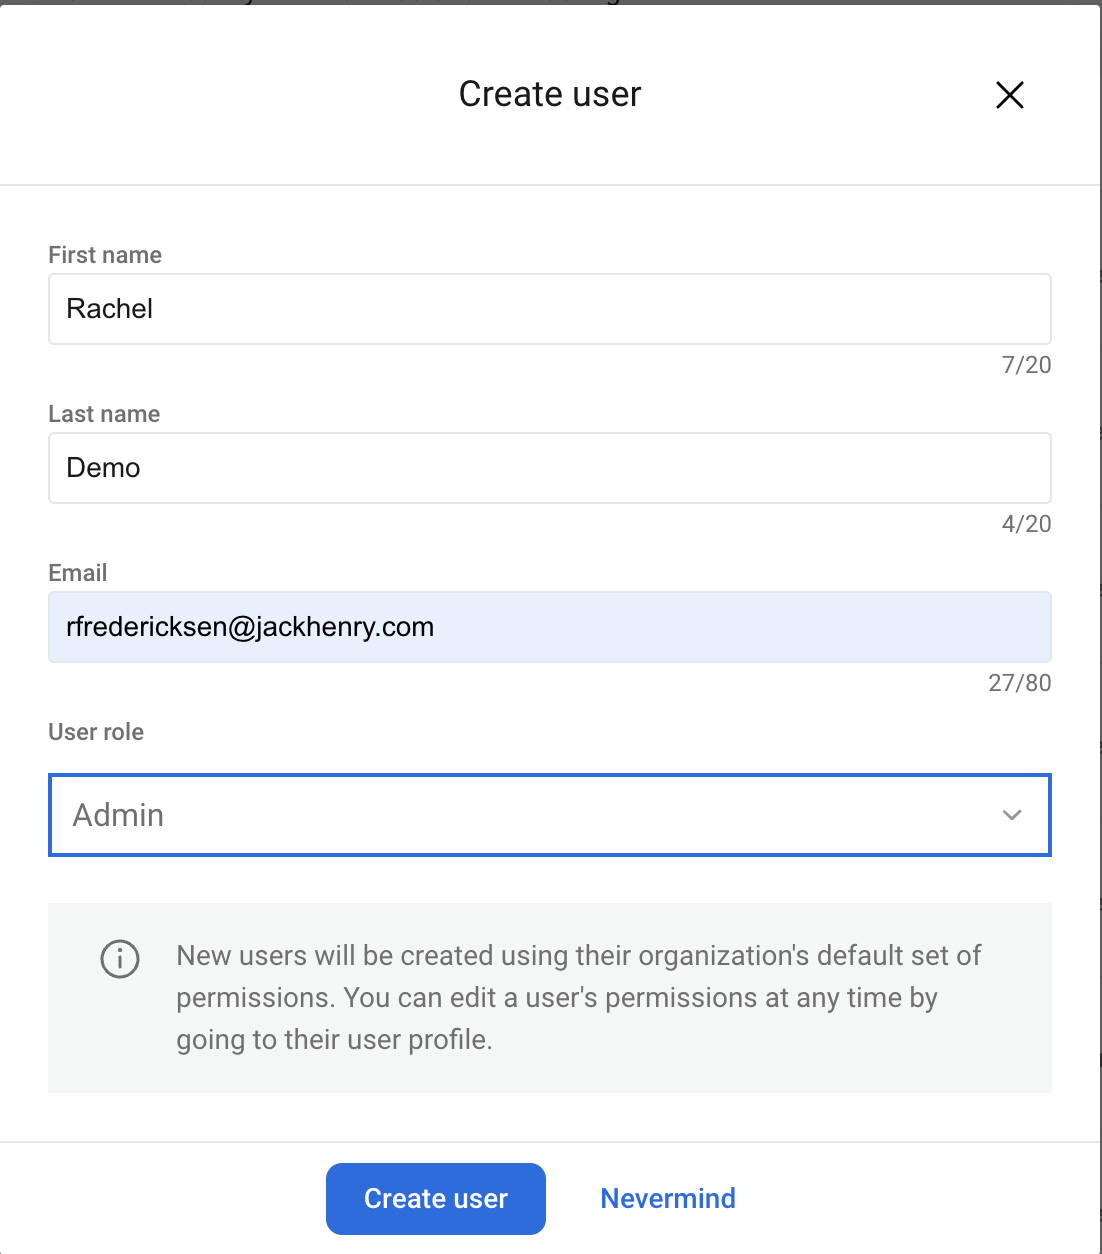
Banno sends the supplied user information to the Unified Identity Service via the enrollment/start API
{
  "clientId": "1234f43a1-2a7a-48b1-96a4-538210507890",
  "productUserId": "string", (unique id within Your Product)
  "email": "test@jackhenry.com",
  "firstName": "Rachel",
  "lastName": "Demo",
  "requiredSecurityLevel": "enhanced"
}
requiredSecurityLevel is optional and accepts standard, enhanced, or high. The Unified Identity Service page in the Jack Henry Knowledge Base lists the verification methods each level permits. Treat it as a request rather than a guarantee — if the institution’s default is more restrictive, or an FI admin modifies a user’s level later, the level in effect won’t be the one you sent.
Once the user gets to the Unified Identity Service enrollment screens, they’ll see editable profile fields that were pre-filled with the data provided in the enrollment/start API request.
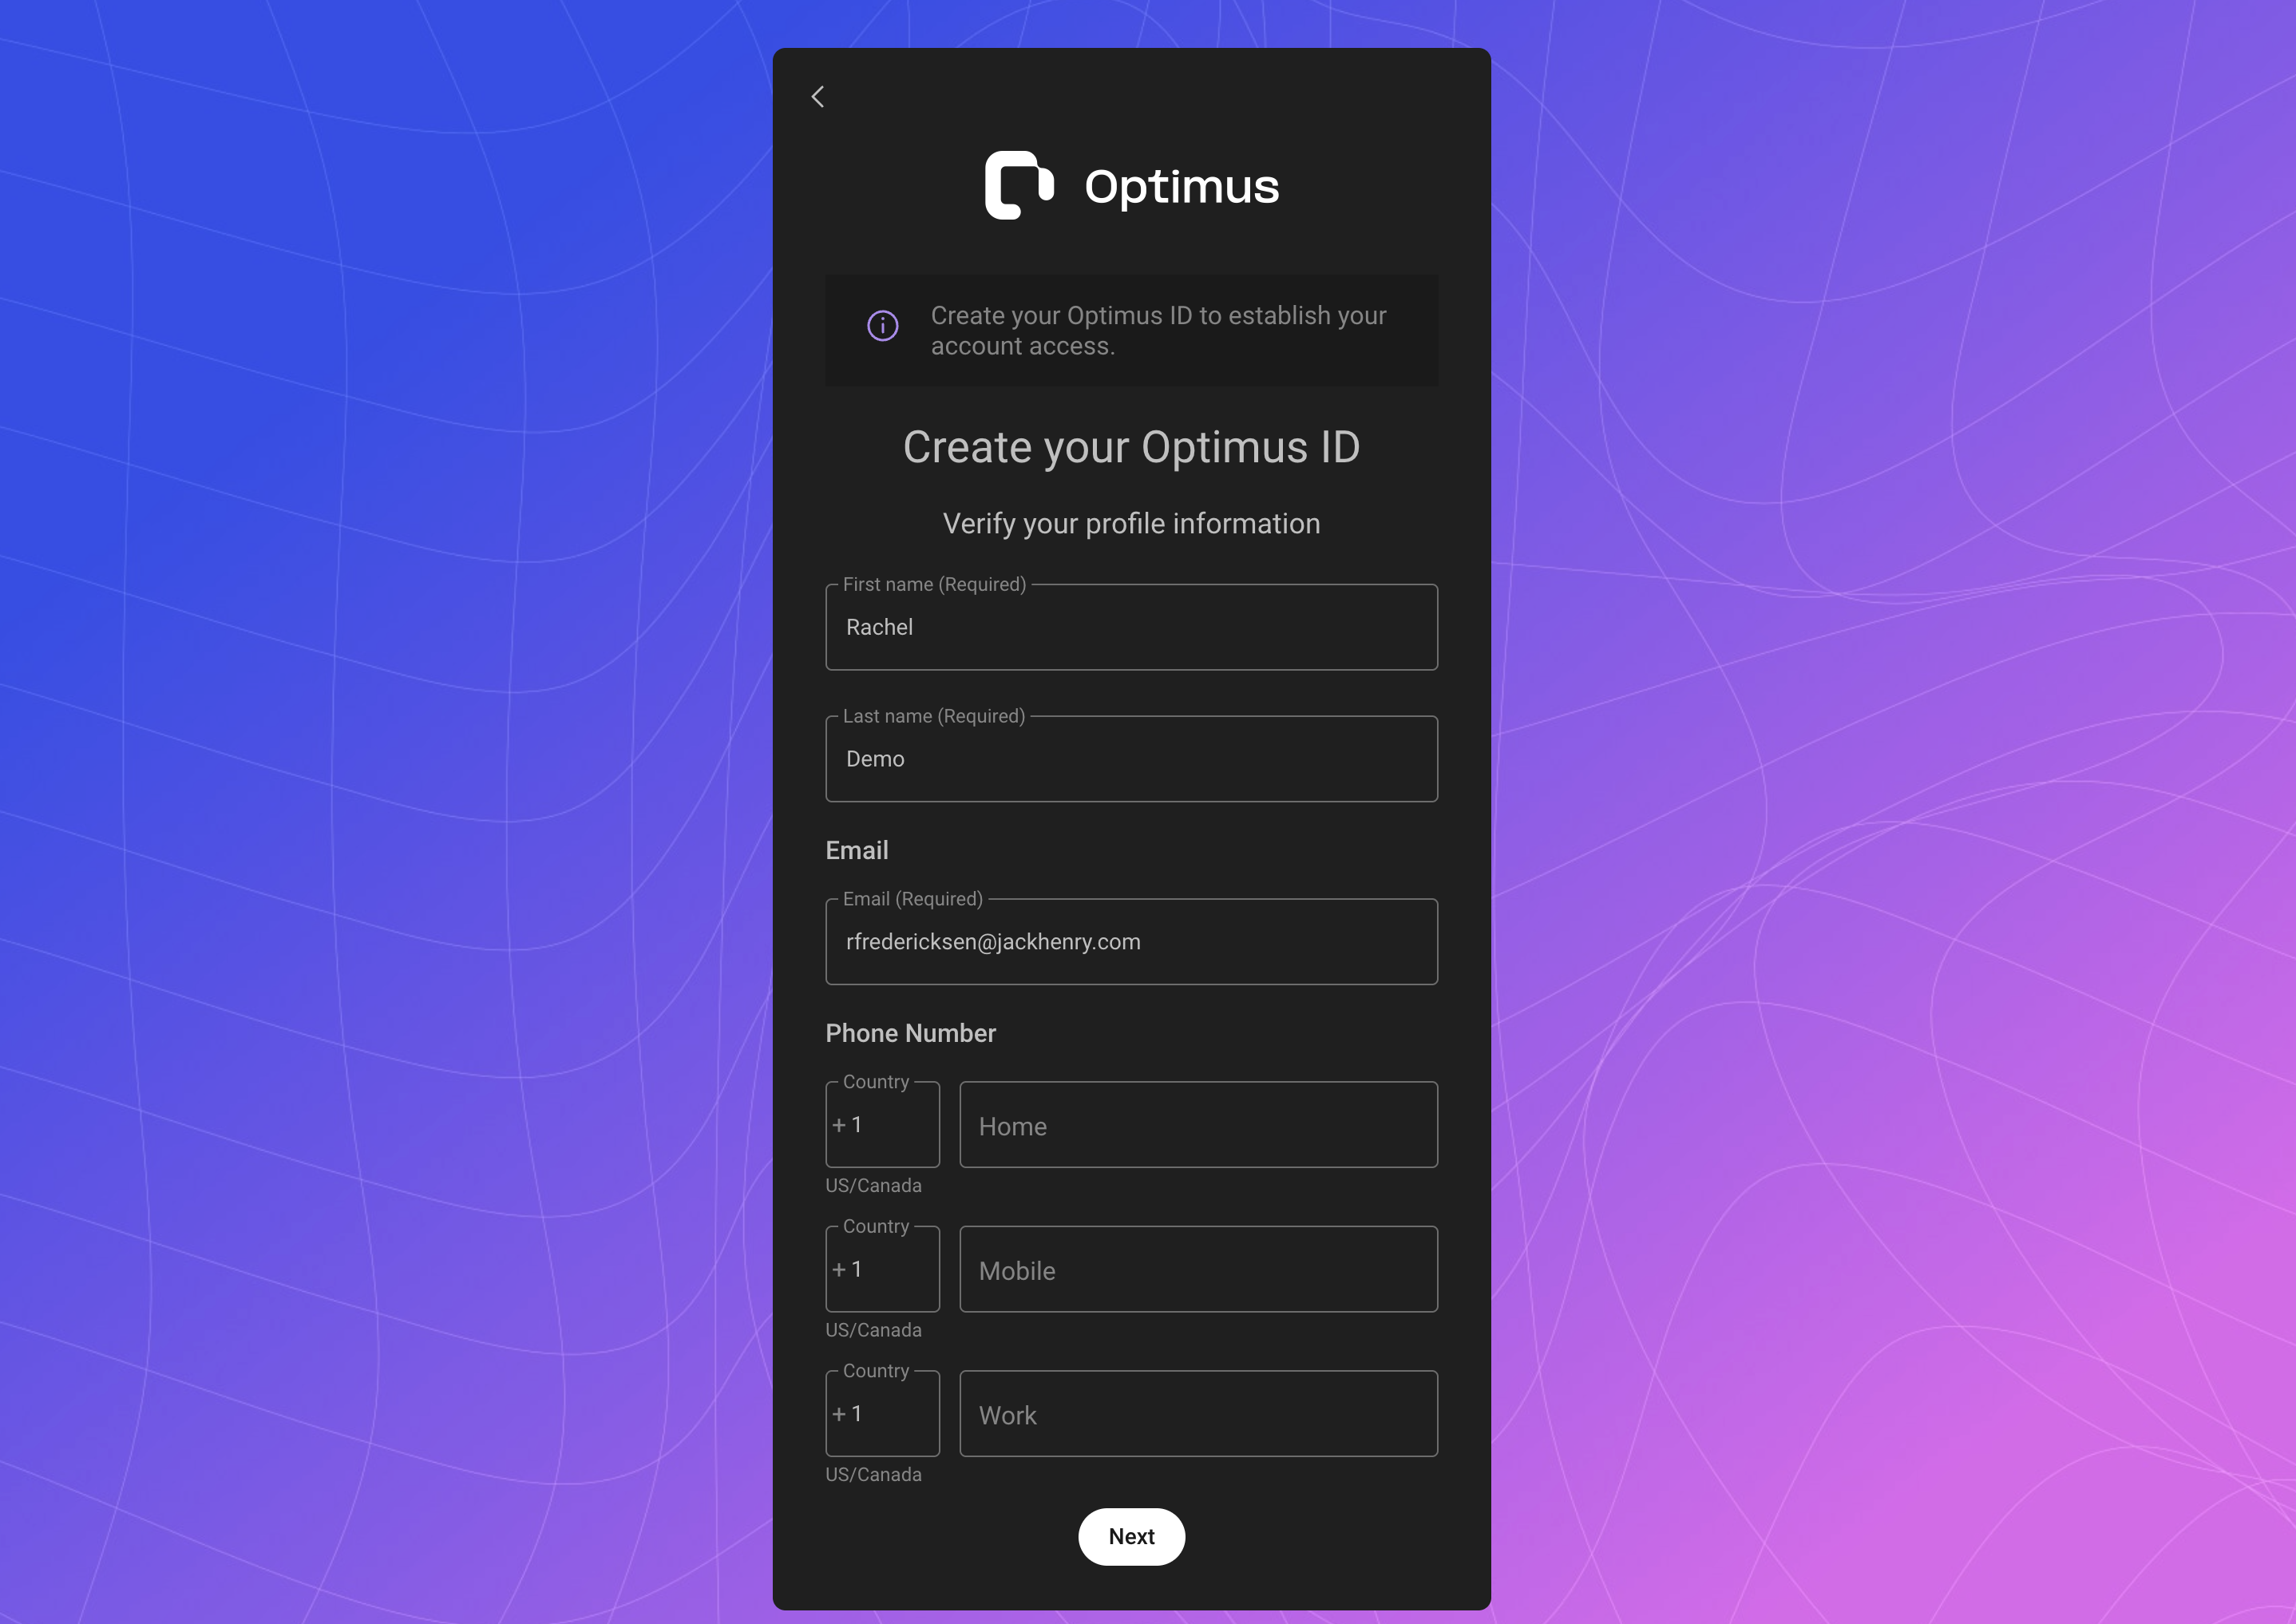
enrollment/start request can be made (and the 1 hour UIS expiration clock started) after the user has clicked the link contained in your email invitation.Your Product will use a Client Credentials Flow to authenticate with the
enrollment/startUIS API, for providing the initial user details and obtaining anenrollmentId. The scopehttps://jackhenry.com/uis/uis.enrollmentis required.Your Product will initiate an OAuth Authorization Code flow:
- Generate
code_verifierandcode_challenge(if using Proof Key for Code Exchange). - Redirect to the
/oidc/authendpoint.- Include
scopeparameteropenidso an Identity Token can be obtained in addition to an access token. - Include
promptparameterenrollso that yourproductUserIdis returned as aclaimin the Identity Token. - Include the
enrollmentIdparameter with the value obtained from the UISenrollment/startresponse.
- Include
- Unified Identity Service will authenticate the user, and redirect the user back to Your Product’s URL with an authorization code and other parameters.
- Your Product will finish the enrollment process and store the unique identifer for the UIS identity that the user chose to create or link.
- Your Product triggers the
/oidc/tokenrequest (including the previously generatedcode_verifier, if applicable). - The resulting Identity Token will include claims for both the unique identifier for the UIS identity (
sub) and for theproductUserIdyou supplied in theenrollment/startUIS request. - Your Product may wish to update the user’s status within your product, such as updating the user from a “Pending” status to “Enrolled” or “Active”.
- Have a how-to question? Seeing a weird error? Get help on StackOverflow.
- Register for the Developer Office Hours where we answer technical Q&A from the audience.