Inviting a User
A Jack Henry associate will ensure that the appropriate indivdual(s) from each financial institution are set up as back office administrator(s) with privileges to provision additional users. Those administrator(s) will then use the Users & Groups application in Banno Admin to create groups which include permissions for JH products, and assign the financial institution’s users to the appropriate groups. The number of supported products will continue to grow, and so the experience will vary depending on the products each financial institution uses.
Check out the basics of inviting a user and navigating the Users & Groups application here.
Each user must be assigned to at least one group, but the group is not required to include any permissions. Below are a few examples that will help illustrate how a financial institution might utilize groups for a product integrating with Jack Henry Identity.
Example 1 - Inviting a user who needs to be a back office administrator
There are several permissions to control which users can do functions such as viewing users or groups; inviting users; creating or editing groups and their associated permissions; and assigning users to groups with the appropriate permissions.
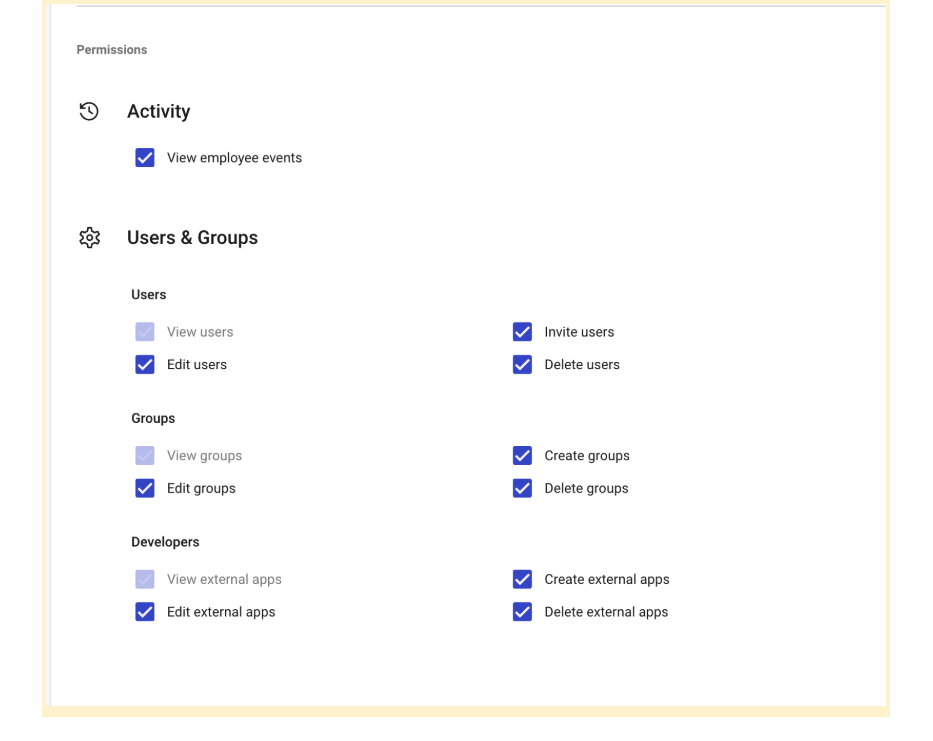
It’s a common practice for one or more users to be assigned all of these Users & Groups permissions so they can serve as a back office administrator. For some institutions, it makes sense to separate the users with privileges for managing users and groups from the users with privileges for managing external applications (which are used for integrations leveraging our Authentication Framework).
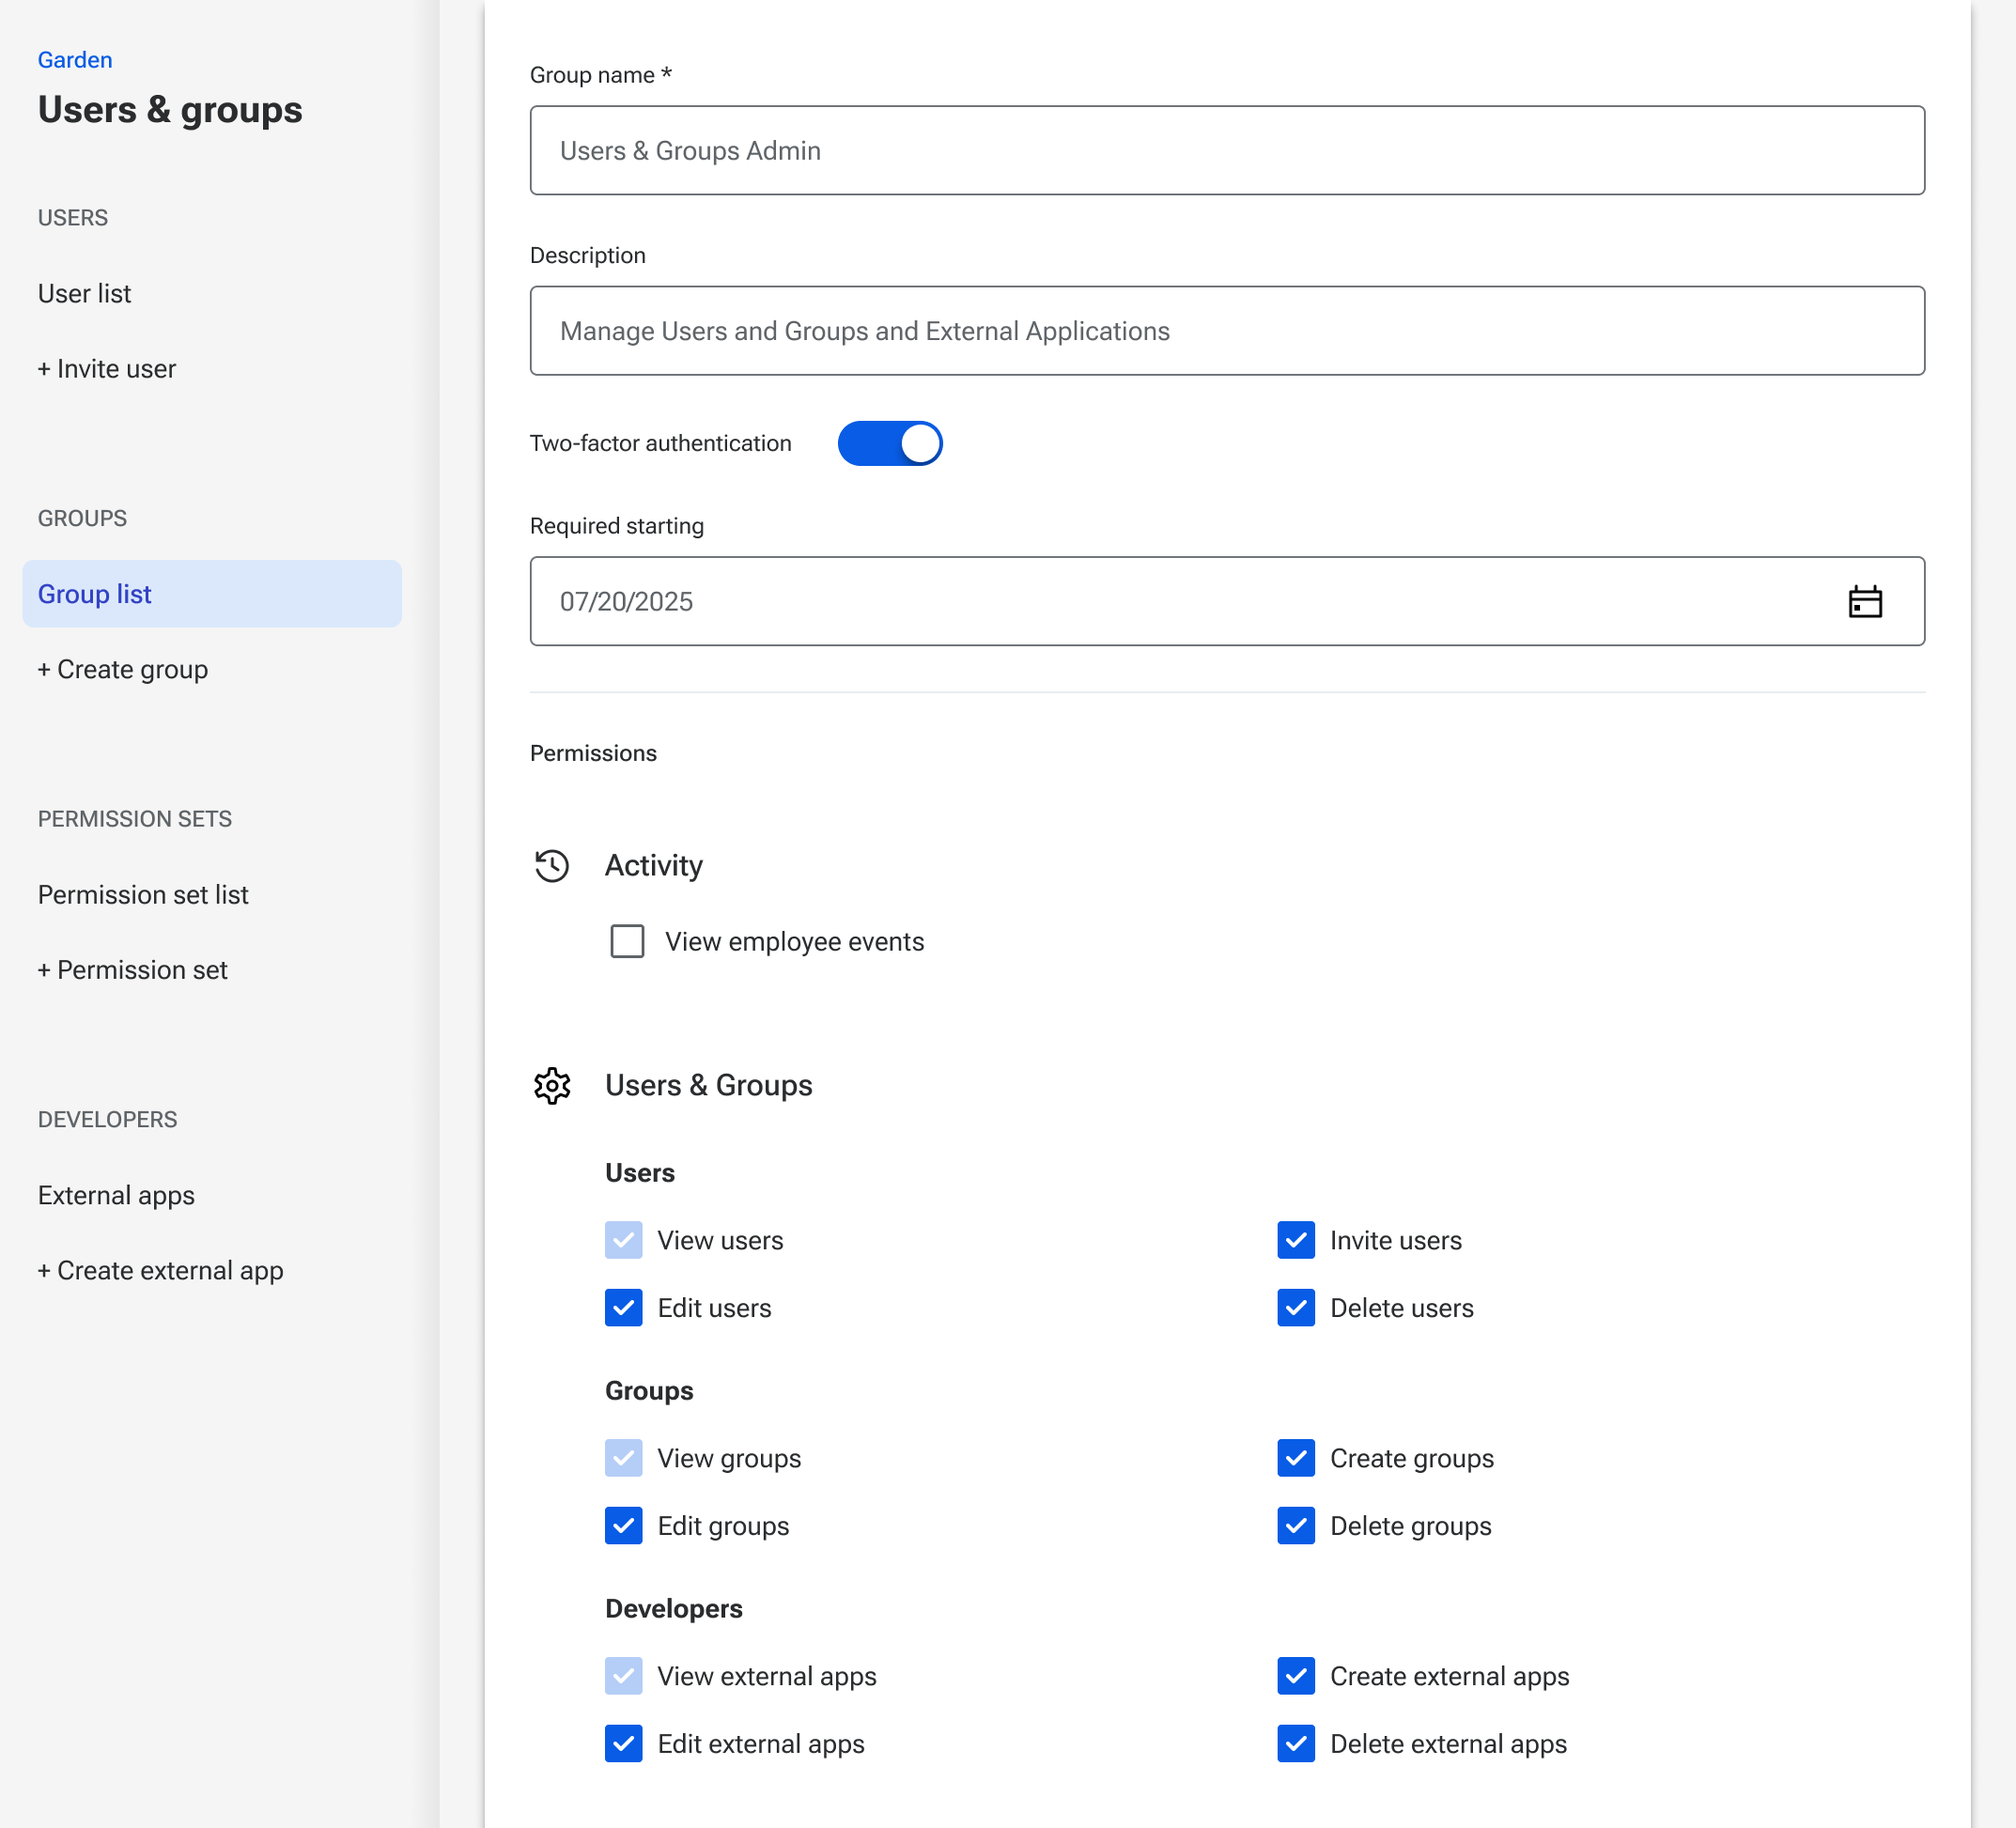
A simple place to start is to create a group named something like “Users & Groups Admin” or “Back Office Administrators”, and grant all of the Users & Groups permissions to the group.
Note: Depending on the products your financial institution uses, you may see different permissions available (e.g. for Activity, Content, People).
Where to go next…
Depending on how your financial institution divides work across individuals and teams, this group may be all you need for your back office administrators. If that’s the case, invite those users and assign them to the group.
In other cases, there may be separate functions that the users who serve as your back office administrators also need to complete, requiring them to have additional privileges. Those additional privileges could be granted by:
- Assigning the permissions to this same group, OR
- Creating a separate group for the permissions, and assigning the user to both groups.
More information about working with both Banno groups and Platform groups is available here.
Example 2 - Inviting a user who needs to authenticate through Jack Henry Identity for a product with permissions managed outside of the Users & Groups application
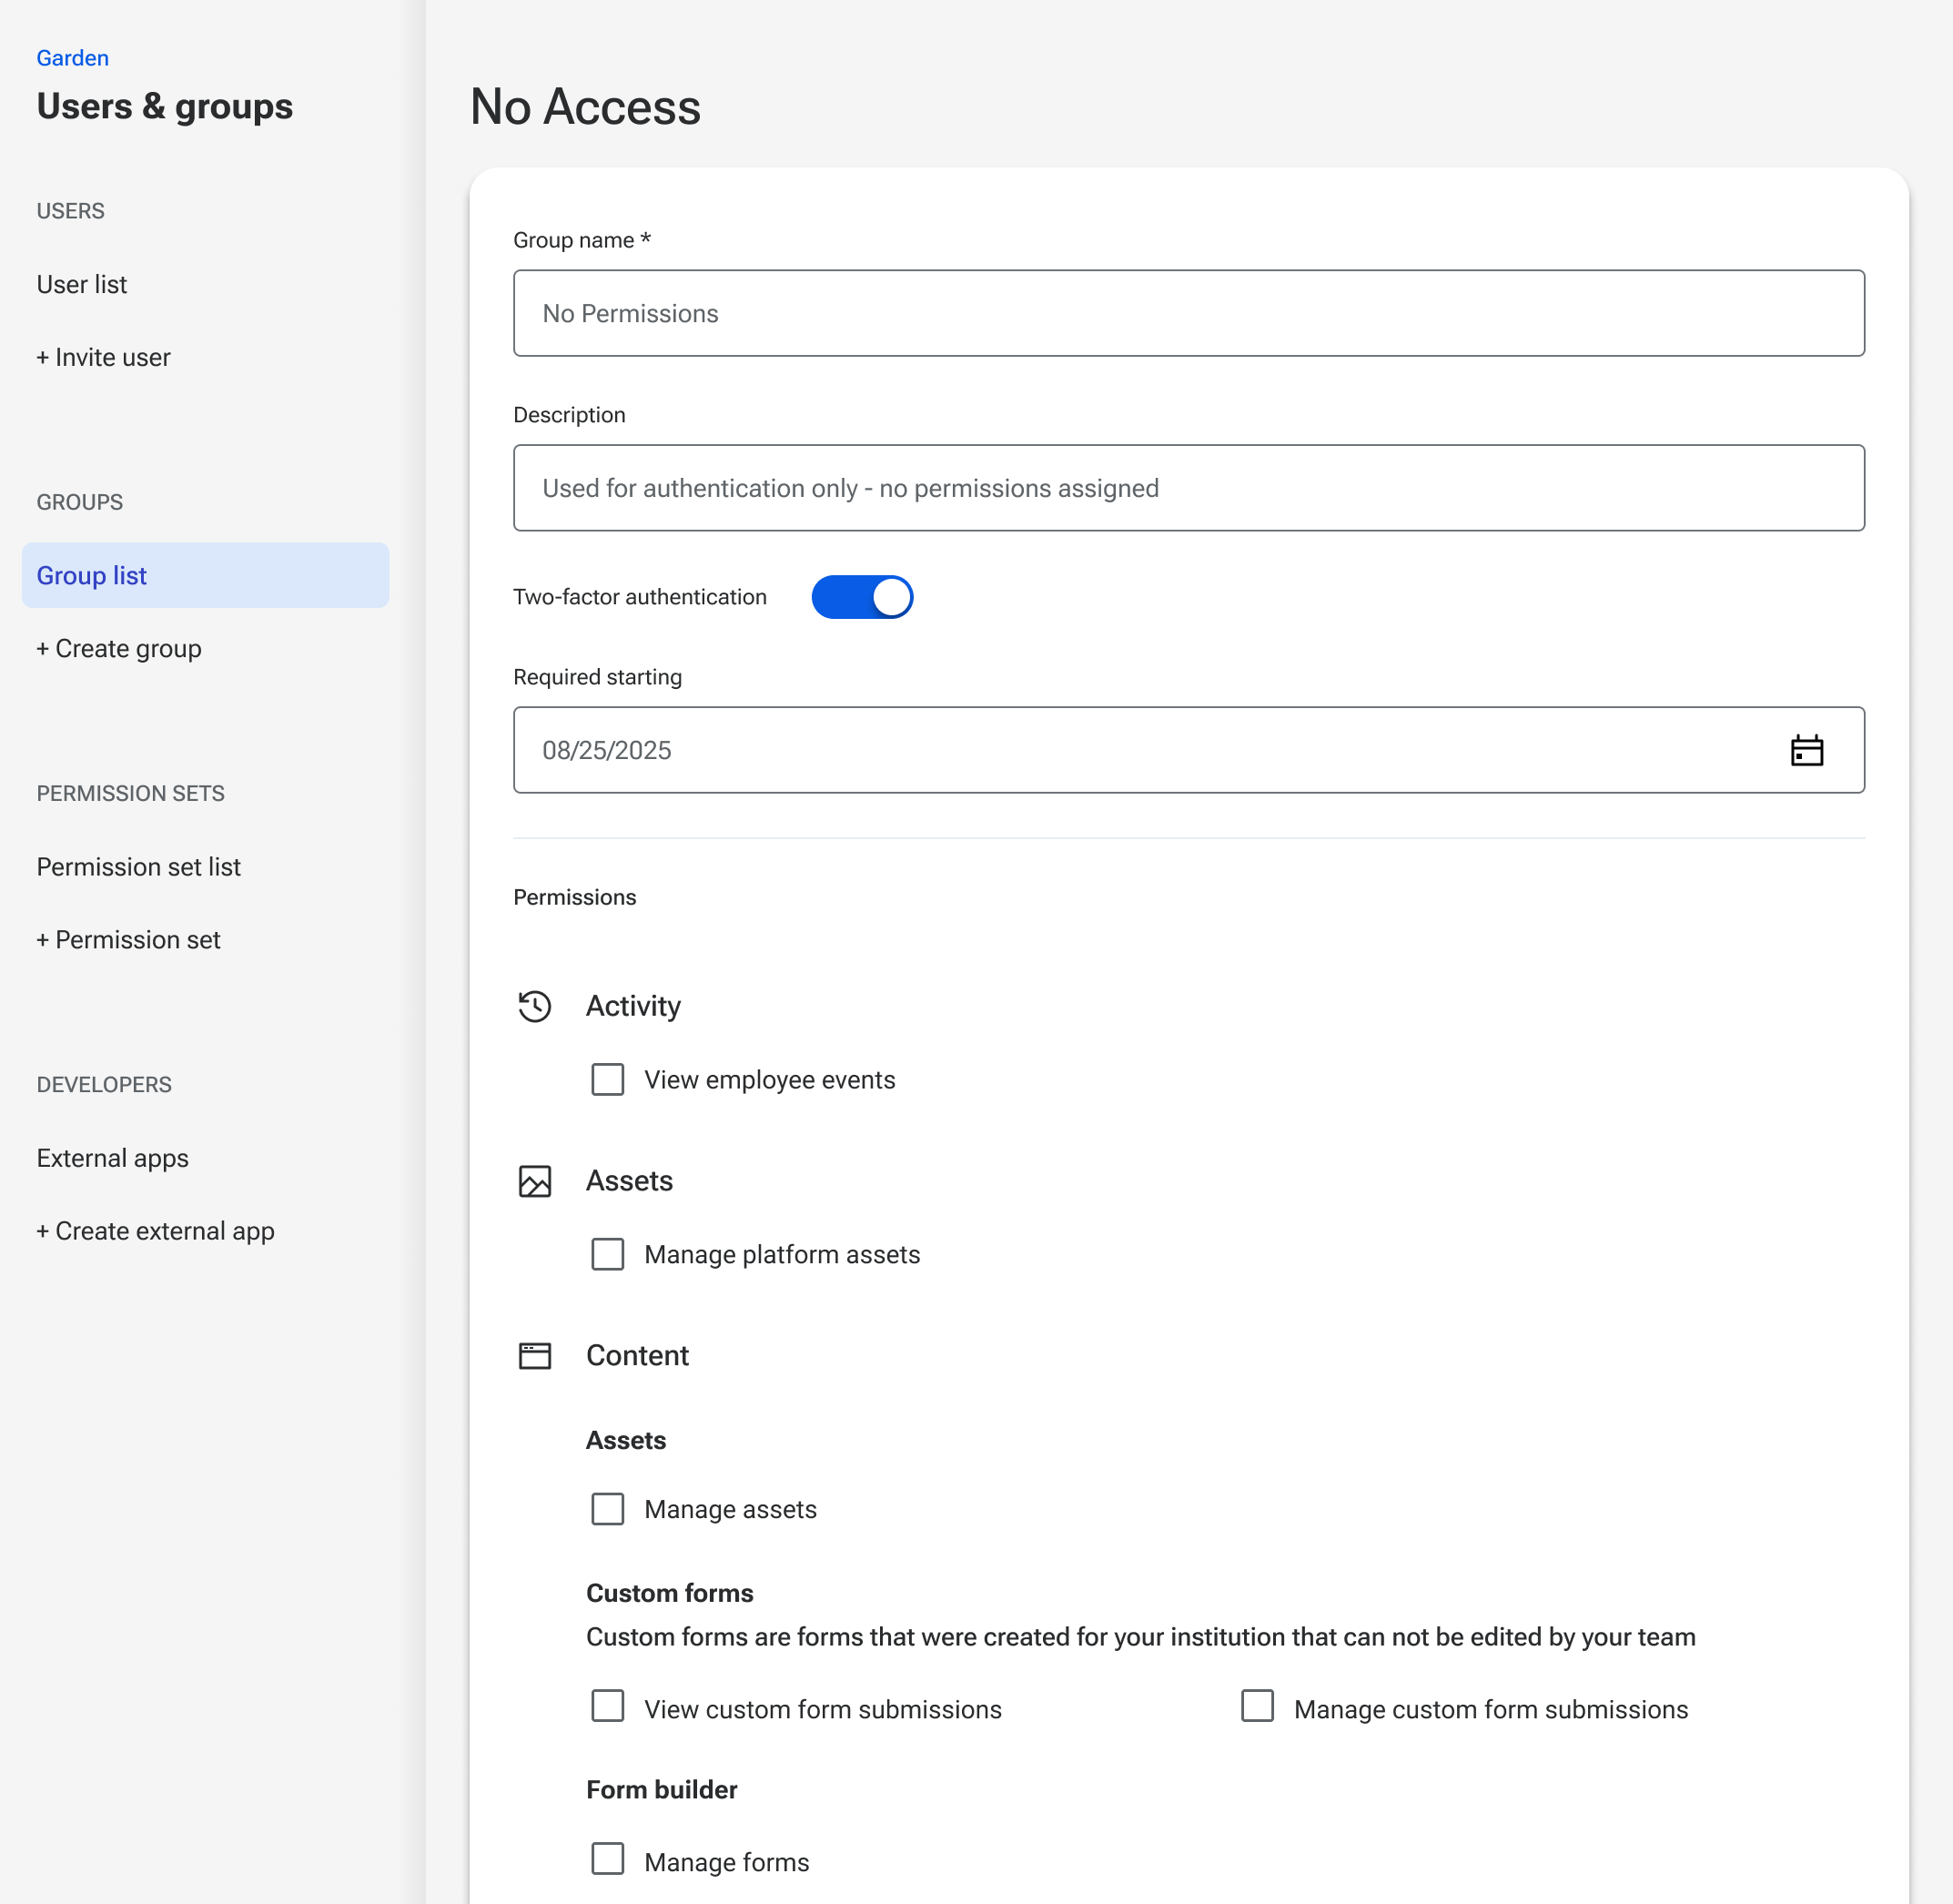
For some products integrated to Jack Henry Identity, the permissions are viewed and controlled through a separate system and are not available within the Users & Groups application. In those instances, each user will exist within the Users & Group application but won’t need to have any specific permissions (except the “Permit sign in via Banno” permission for institutions that utilize the Xperience SSO for Banno Admin.)
For this use case, it’s recommended to create a Group that has no permissions assigned and name it something like “No Permissions”.
Once a new user has been set up and assigned permissions within the integrating product, they can be invited to the “No Permissions” group so they can select a password and finalize their profile.
Where to go next…
If one or more of these users need to be granted permissions to something through Users & Groups, you could modify the “No Permissions” group or establish a separate group, depending on your needs. More information about working with both Banno groups and Platform groups is available here.
- Have a how-to question? Seeing a weird error? Get help on StackOverflow.
- Register for the Developer Office Hours where we answer technical Q&A from the audience.